Difficulty
Easy
Steps
5
Time Required
- Smith Acetylene Torch 5 steps

User-Contributed Guide
This guide is not managed by the site's staff.
Quiz
0
Introduction
How to Light the Smith Acetylene Torch (Plumber's Torch)
-
-
Leak testing must be done on a weekly basis. Check the latest date on the leak test sheet nearby. If a leak test has not has not been done in the past 7 days, perform a leak test.
-
Make a soapy water mixture (1/2 cup water and 3-4 squirt dish soap from the sink dispenser.)
-
Brush the soapy water mixture all the way around all 5 Acetylene gauge and tank joints and fittings.
-
Brush the soapy water mixture all the way around each of the torch hose fittings.
-
If bubbles form, turn off all valves starting at the tanks and contact Heather (517) 203-6482
-
If the leak test is successful and no bubbles are seen, mark today's date on the sheet above the torch.
-
-
-
Turn valve on tank counterclockwise to open.
-
With tank on, slowly turn the regulator valve clockwise until the desired pressure is reached. (Normally between 6-10 psi, NOT more than 10 psi.)
-
The red zone, on the psi gauge, indicates a highly dangerous zone! Operating the torch above the instructed 10 psi can be hazardous. If you notice the gauge is rising and not holding steady, turn the tank off. Then call Heather 517-203-6482.
-
-
-
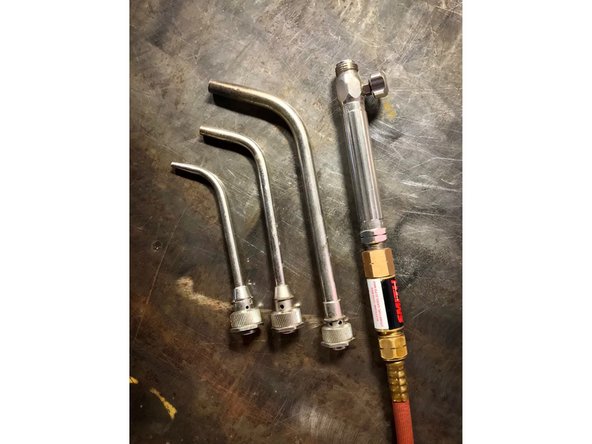
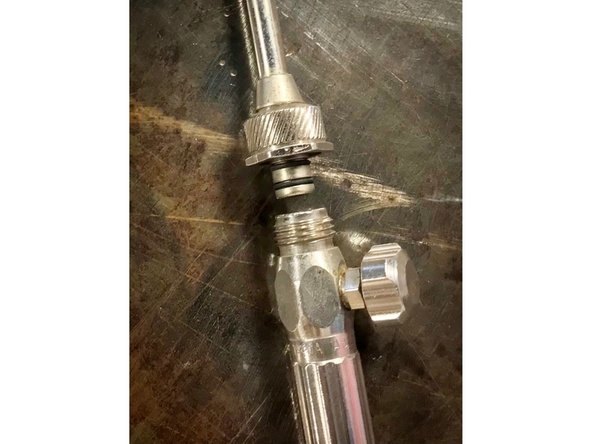
Select the appropriate tip and attach securely by pushing the torch tip into the torch handle and tighten nut.
-
Ensure torch tip holes are open and uncovered before proceeding.
-
-
-
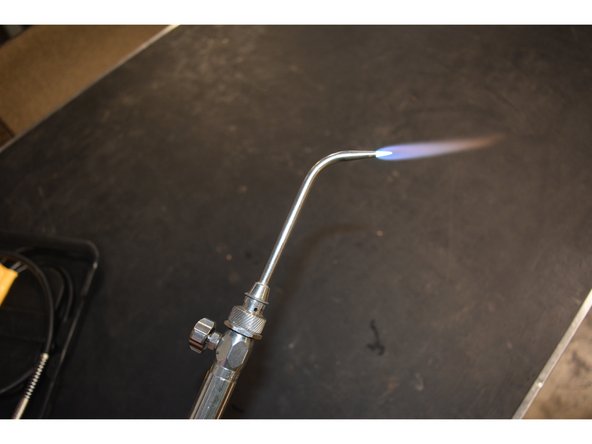
With tip attached, turn the torch knob counter clockwise and light with the striker provided (on the table next to the torch).
-
Once the flame is lit, use the torch knob to adjust the flame.
-
-
-
Turn valve on tank clockwise until closed.
-
Open valve on torch to purge. Regulator should return to zero. If it does not return to zero, contact a volunteer or make a post on the talksite.
-
Turn the regulator pressure adjusting handle counter-clockwise until no spring pressure is felt.
-
Close valve on torch.
-
Remove tip and store.
-
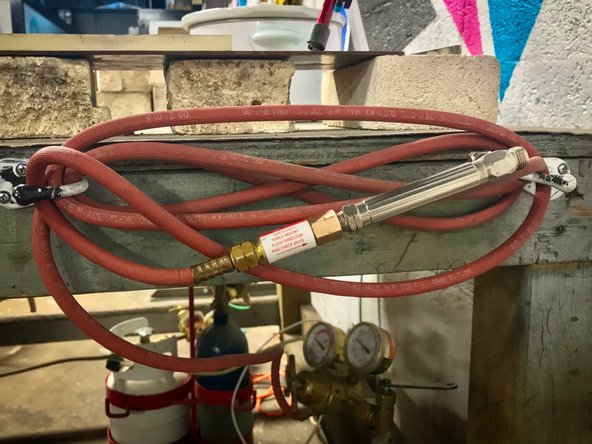
Coil up hose and torch handle.
-