
-
-
Click File -> Import on the menu bar
-
Select your file and click "open"
-
The laser cutter can import dxf and ai files most easily for vector formats. Additional formats are supported for image engraving.
-
-
-
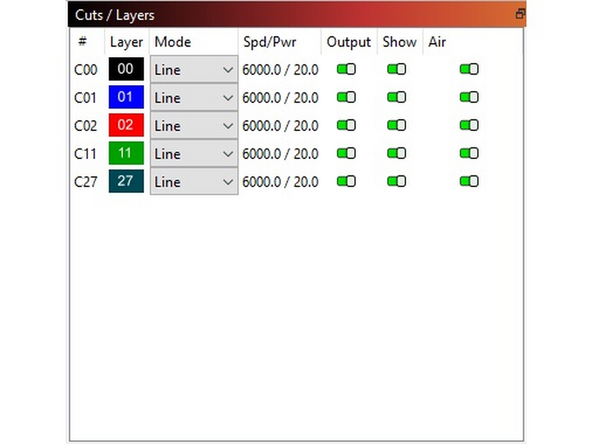
Layers or colors will be separated depending on the file type you are importing. (Refer to documentation for specific programs for details).
-
Check the "Cuts / Layers" in the top-right of Lightburn to see that your layers imported correctly.
-
Click the "Window" at the top, and makes sure Cuts / Layers are selected if you do not see it.
-
-
-
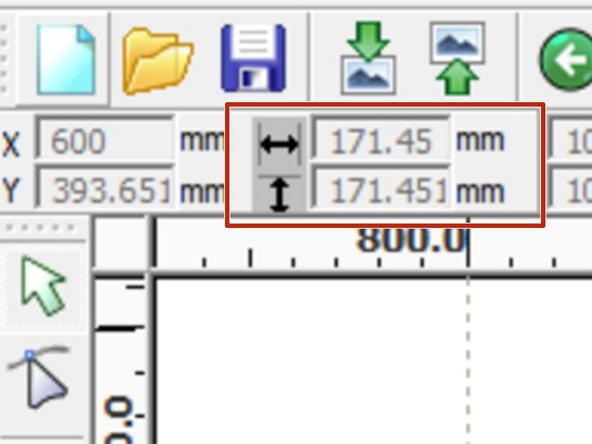
Press Ctrl-A to select all objects.
-
Check that the dimensions displayed in the top-left of Lightburn are correct for you desired output size. Adjust as needed. If you cant see, make sure in full screen.
-
DXF files can be imported with the wrong units. Checking the overall job dimensions helps prevent surprises.
-
-
-
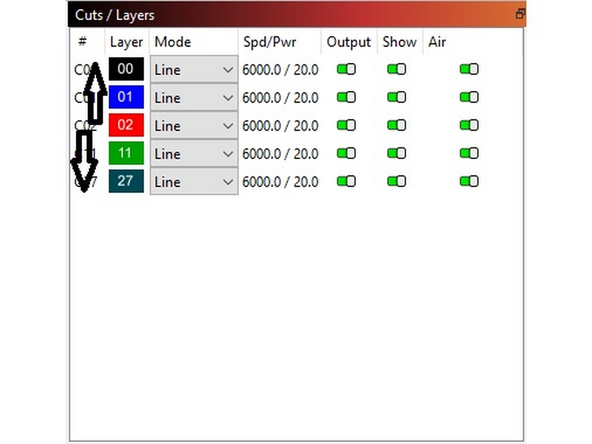
If your job has multiple “layers”, the layers will be cut in the order they are displayed in the work panel.
-
Reorder layers by dragging and dropping them into the correct order.
-
Key Point: It probably makes sense to set engrave layers before cut layers as the focus or position can change once the job is free from the surrounding material.
-
-
-
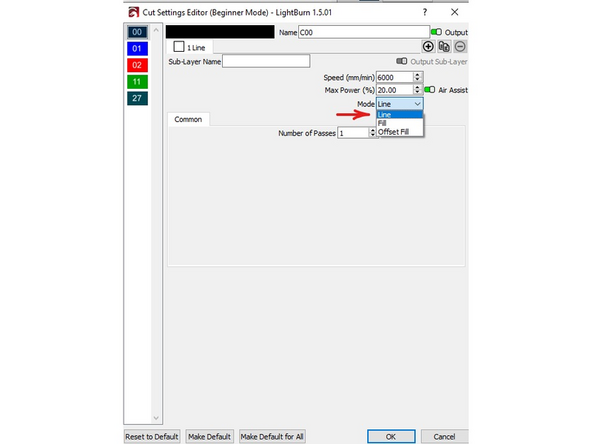
Processing Mode
-
Line: The laser cutter will follow your vectors.
-
Scan: The laser cutter will "Fill" across your atwork, turning the laser on and off depending on if your shape it closed or not.
-
Ouput: Controls whether the layer will be output to the machine.
-
Even if "output" is "off" the layer will still be used when calculating the origin point. This is useful for reburning only portions of your design.
-
-
-
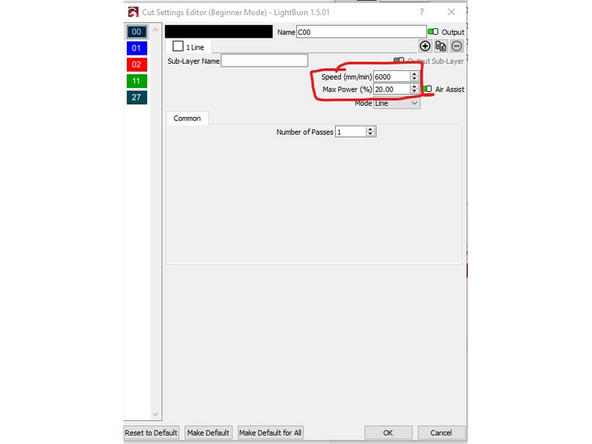
Speed: Sets the speed the laser will use when running the layer.
-
For a deeper engraving, decrease the speed.
-
For a lighter engraving, increase the speed.
-
Power: The power the laser cutter will use to drive the tube.
-
Max value: 50% (the laser will clip beyond this number)
-
For a lighter engraving, decrease the power.
-
For a deeper engraving, increase the power.
-
-
-
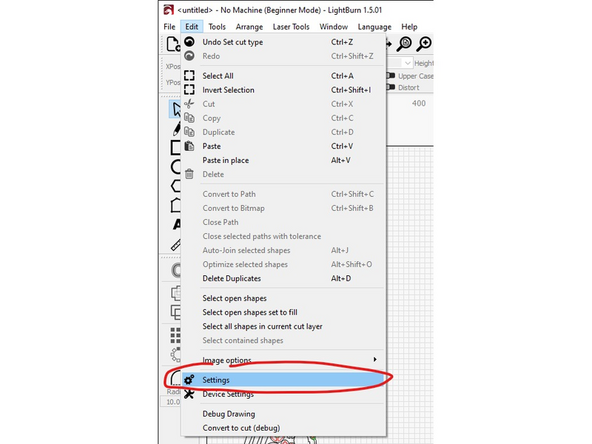
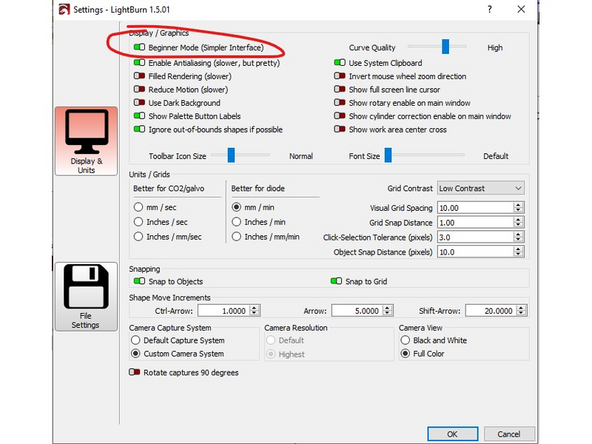
In order to gain access to the Fill settings, at the top select "Edit", then "Settings". Then disable "Beginner mode".
-
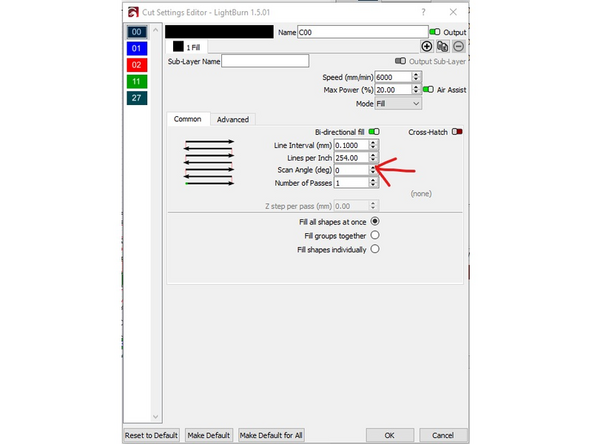
Scan Mode: Controls the direction of the scan operation. CHANGEME
-
Xswing: Scan horizontally, burning in both directions. CHANGEME
-
YSwing: Scan vertically, burning in both directions. CHANGEME
-
X-unilateralism: Scan horizontally, only burning in one direction (slower) CHANGEME
-
Y-unilateralism: Scan vertically, only burning in one direction (slower) CHANGEME
-
Interval: The amount the laser cutter will "step" between each scan line. 0.1mm is a good starting number.
-
-
-
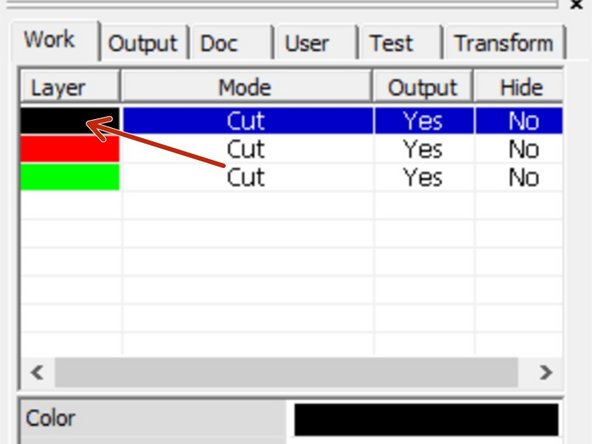
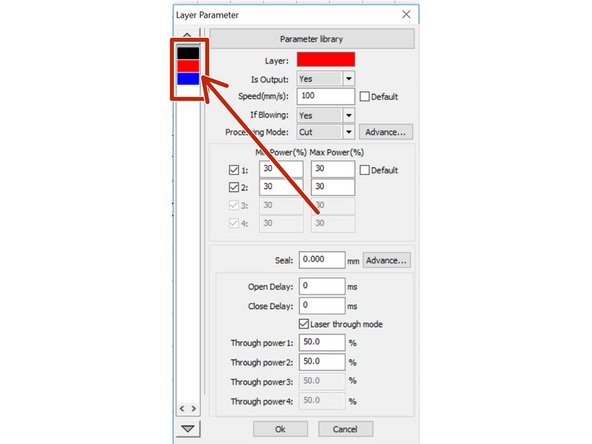
To jump between layers, you can click the layer swatches on the left hand side of the layer properties dialog.
-
-
-
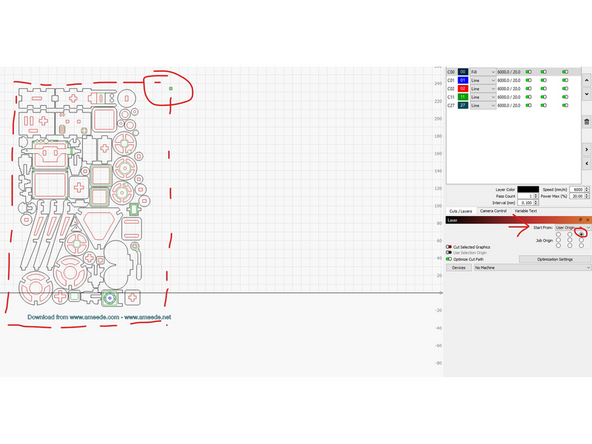
The origin determines how the laser cutter will reference your design to the actual material.
-
You can choose from 9 positions. When setting up the machine, you will align this position on your artwork to the correct location on your material.
-
Choose: Start From: User Orgin from the "Laser" bar to access the dropdown
-
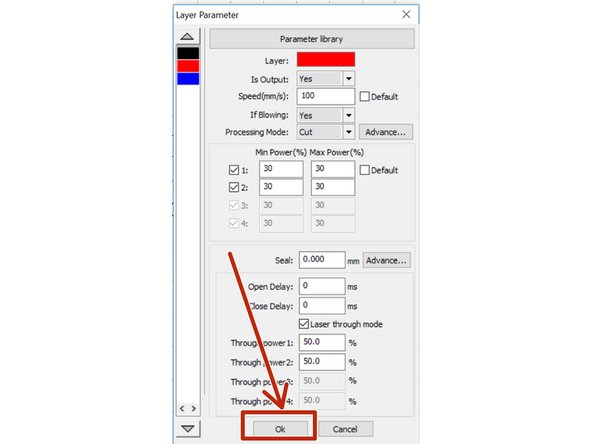
Click "Close" to save your settings.
-
-
-
Saving your RLD file saves all of your layer settings and job setup. You can also skip this step and go directly to running your job.
-
Select File -> Save
-
Enter a Filename
-
Click "Save"
-
Please avoid leaving files saved on the desktop. Create a folder in "Documents" if you need to save something.
-
Files saved on the laser cutter computer may be deleted at any time, without warning. Please take responsibility for your own files and backups!
-


You've successfully completed your job setup. You're now ready to proceed to laser cutter startup!
You've successfully completed your job setup. You're now ready to proceed to laser cutter startup!