Difficulty
Moderate
Steps
5
Time Required
- 04 - Run a Part Program 5 steps

User-Contributed Guide
This guide is not managed by the site's staff.
Quiz
0
Introduction
Once you have your G Code program from VCarve, it is ready to run on the machine. This guide explains how.
-
-
Export your program from the CAM software to a USB drive.
-
Plug your USB into the port on the lower right of the control panel.
-
-
-
Click “Part Program” in the top tool bar and select “Part Program Management.”
-
Navigate to and select the part program. It will be in the "USB" directory.
-
Click "Activate Part" to load the program in the controller.
-
Alternately, click "Edit" to open the file in the text editor and manually modify or view the G code.
-
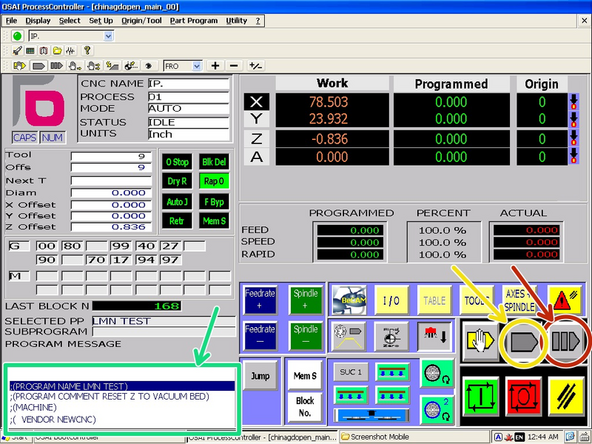
Close the Part Program Management Window. Your program name should now appear in the "Selected Part Program" field.
-
-
-
Click the "Block-by-block Mode" button.
-
Use the keyboard up and down keys to navigate between blocks (lines) of code.
-
Check that the notes at the top of the program match what you anticipate based on the setup:
-
Tools and their numbers match what is actually loaded.
-
The origin you set matches the program origin.
-
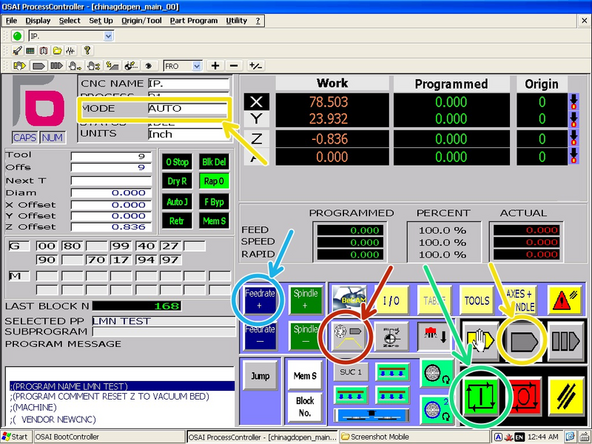
Use the up arrow key to scroll back to the top of the program. Click the "Auto Mode" button.
-
-
-
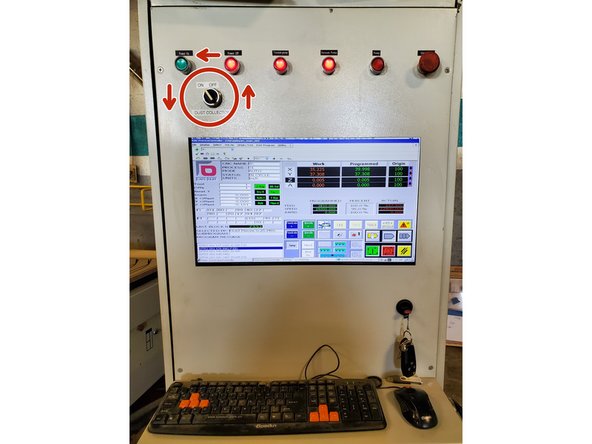
Use the switch on the control panel to turn on the dust collector.
-
Also make sure the vacuum pumps are on and valves open if using vacuum work holding.
-
-
-
Using hand wheel prove out mode will control the program feedrate by the rotation of the hand wheel. This will allow you verify that the program seems to be working correctly at the start (where most issues occur).
-
It is recommended that you switch to the first tool before starting the program to avoid doing a tool change in this mode . See "Pick Up a Different Tool Holder"
-
Click the "Hand Wheel (MPG) Prove Out Mode" Button.
-
Ensure the controller is in "Auto" mode. Click the "Auto Mode" button if not.
-
Click "Cycle Start."
-
Rotate the hand wheel to slowly proceed through the initial moves of the program.
-
If everything looks good, disable hand wheel prove out mode and click "Feedrate +" until the feedrate reaches 100% to continue cutting the part automatically.
-