Difficulty
Moderate
Steps
13
Time Required
- 02 Trotec Ruby Job Setup 13 steps

User-Contributed Guide
This guide is not managed by the site's staff.
Quiz
0
Introduction
Trotec Ruby is the required software for this Laser Cutter.
This guide will walk you through the basics, but you can find much more information at their website.
-
-
Double click the Ruby Icon on the desktop to start the Trotec Ruby Program.
-
-
-
Enter itstaff.@lansingmakersnetwork.org
-
Hit enter to login.
-
If autofill does not work, find the password on the label under the keyboard.
-
-
-
Ruby was designed for engineers that would be reproducing the same items over and over on the same materials.
-
Navigational tools are setup in left and top menus as well as tabs at the top of window.
-
Manage Screen: This screen will list designs in progress, and jobs that are ready to cut.
-
More information at: https://www.troteclaser.com/en-us/learn-...
-
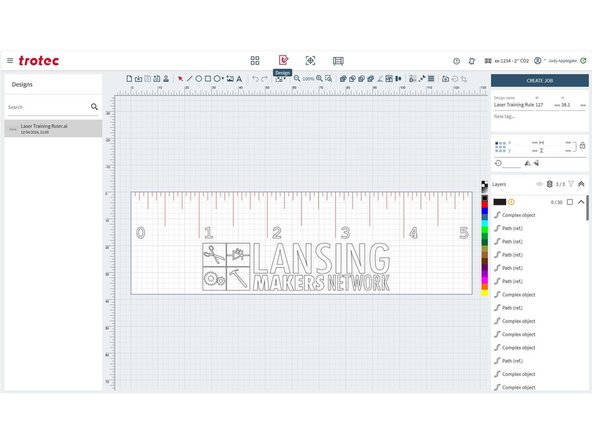
Design Screen: Use this area to create and edit designs for the laser job.
-
More information at: https://www.troteclaser.com/en-us/learn-...
-
-
-
Ruby was designed for engineers that would be reproducing the same items over and over on the same materials.
-
Navigational tools are setup in left and top menus as well as tabs at the top of window.
-
Prepare Screen: Finalize your created job and push it to the laser. Adjust material settings and processing rules.
-
More information at: https://www.troteclaser.com/en-us/learn-...
-
Produce Screen: Overview of the jobs currently queueing in your Laser. See what the laser is working on and manage the queue.
-
More information at https://www.troteclaser.com/en-us/learn-...
-
-
-
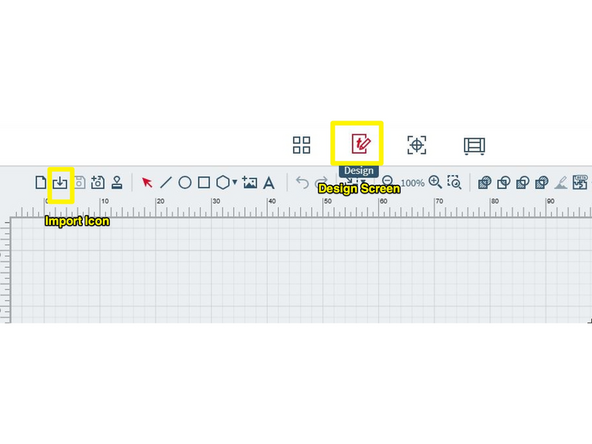
The laser cutter can import dxf, svg, pdf, and ai files most easily for vector formats. Additional raster formats are supported for image engraving.
-
Click the Design Screen, import your file by clicking the import icon.
-
Select your file and click Open
-
You can also find the file on the left toolbar where the design appears.
-
The file may appear in the Manage Screen instead of the Design screen. If so, return to the Manage screen, and look for the file under Designs. Single click the file to see it in the Design Screen.
-
-
-
Layers or colors will be separated depending on the file type you are importing.
-
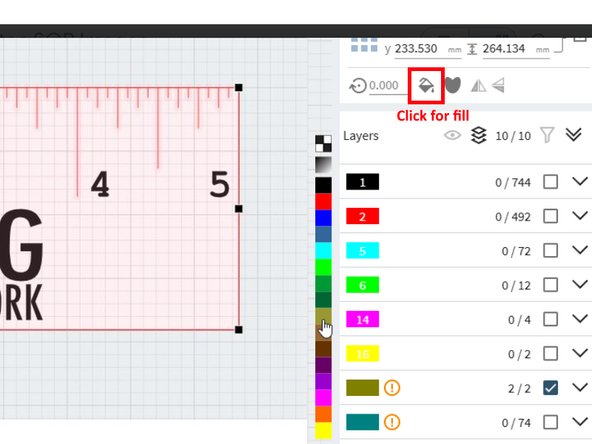
Check Layers in the right menu of Ruby to see that your layers imported correctly.
-
Click the checkbox next to the color on the right menu. Then click the appropriate color on the color bar next to it to normalize everything in that layer. This will ensure that the same setting is used for everything on that layer.
-
Be sure to uncheck the layer in between normalizing the layers, or they will be placed on the same layer.
-
For Fill layers, you will need to select the outline and click the highlighted icon.
-
-
-
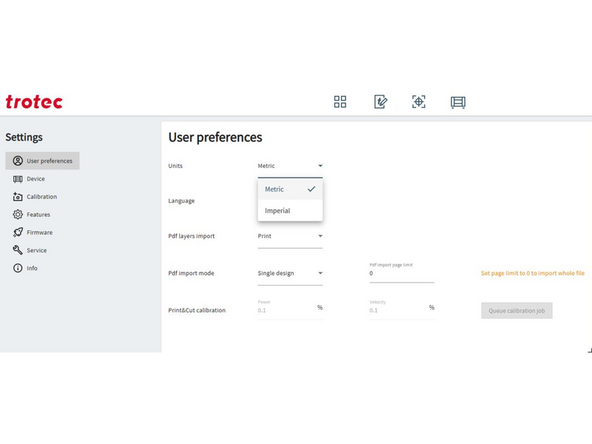
Files can be imported with the wrong units. Checking the overall job dimensions helps prevent surprises.
-
Press Ctrl-A to select all objects.
-
Check that the dimensions displayed in the top of the right hand menu are correct for your desired output size. Adjust as needed.
-
To change the units from mm to in, go to Top Left (Hamburger) menu > settings > user preferences > Units. Click Save.
-
-
-
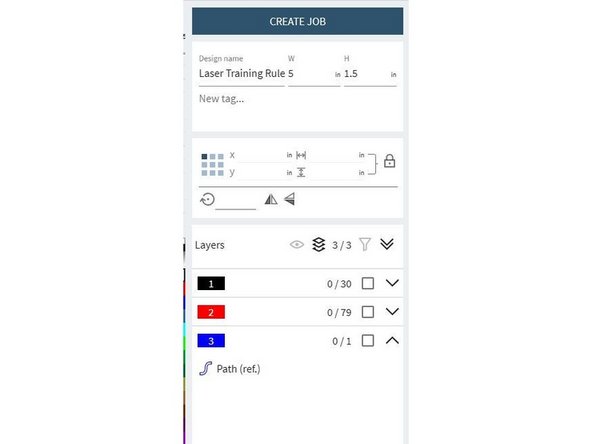
In the top of the right hand menu, name your design. This allows you to organize your work later in the process.
-
Click Create Job. This will open the Prepare Tab.
-
-
-
Reminder that this laser and program were created for engineers doing repeatable designs. Different materials have specific settings already setup.
-
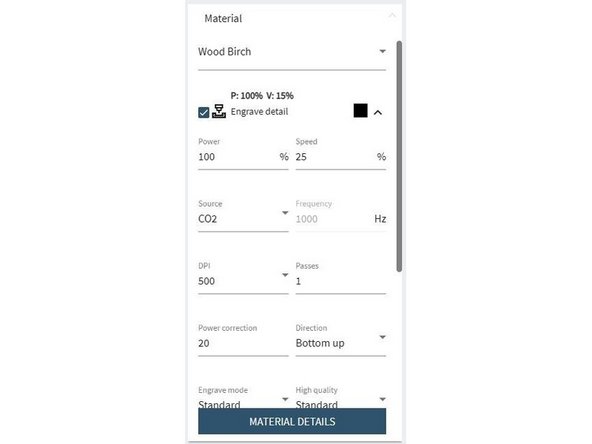
Go to Material, click arrow menu/dropdown. Find your material in the list. For this checkout, select “Wood Birch”
-
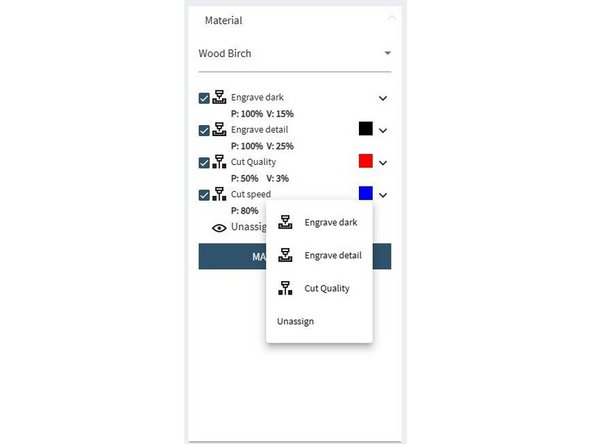
Click each color, and assign it to a setting.
-
Settings are named very differently from other programs.
-
If you would like fill, select Engrave Dark
-
If you would like to etch lines, select Line engrave-Med
-
If you would like to cut, select Cut Speed
-
Colors should now show next to the correct setting name. No color blocks should remain next to “Unassigned” or “Engrave Dark”. Check for unassigned layers.
-
-
-
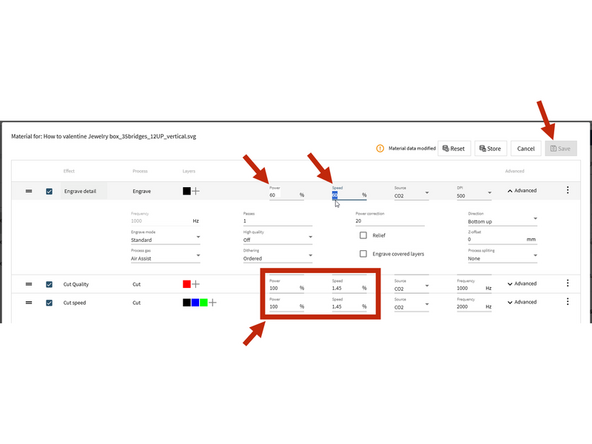
Click the text of a setting name (Ex. "Engrave Dark"). This will bring up the material settings window. Set power and speed as needed for each assigned color.
-
For the checkout ruler project:
-
Engrave Dark: P (power) :60% V (velocity):60%
-
Cut Quality: P:12% V:1%
-
Cut Speed: P:95% V:1.45%
-
Once you have made your changes, the Save button will activate. Click Save to set your new Power and Speed values.
-
-
-
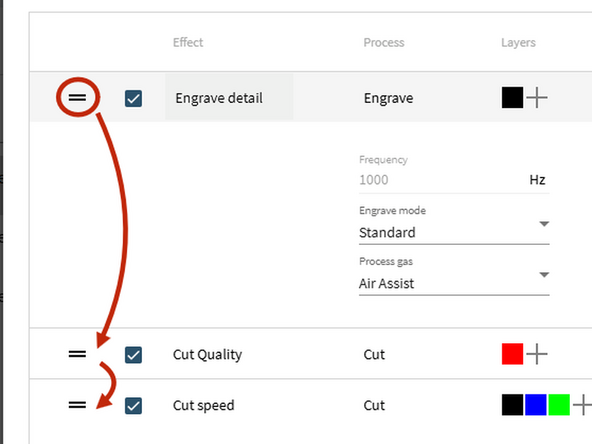
If your job has multiple layers, the layers will be cut in the order they are displayed in the work panel.
-
Go to Material Details
-
Reorder layers by dragging and dropping them into the correct order.
-
Reorder layers by dragging and dropping them into the correct order.
-
Normally it makes sense to set engrave layers before cut layers as the focus or position can change once the job is free from the surrounding material.
-
-
-
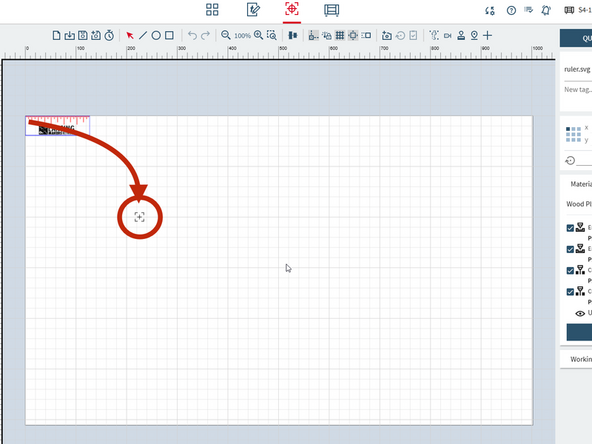
You will see your design on a white grid. There will be a black crosshair somewhere on that field.
-
The black crosshair is the location of the laser head on the bed of laser.
-
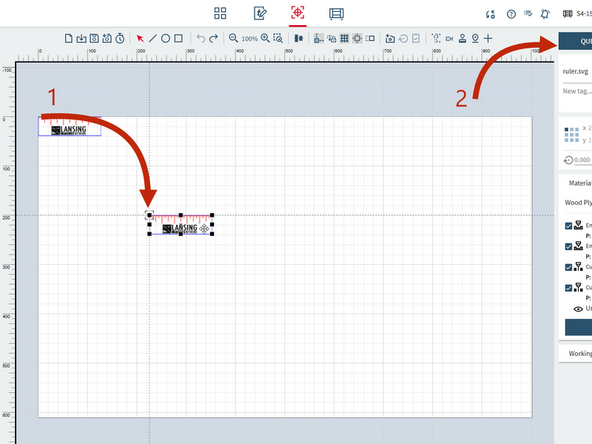
Click and drag your graphic so that the upper left corner of your graphic snaps to the crosshair.
-
Click Queue
-
-
-
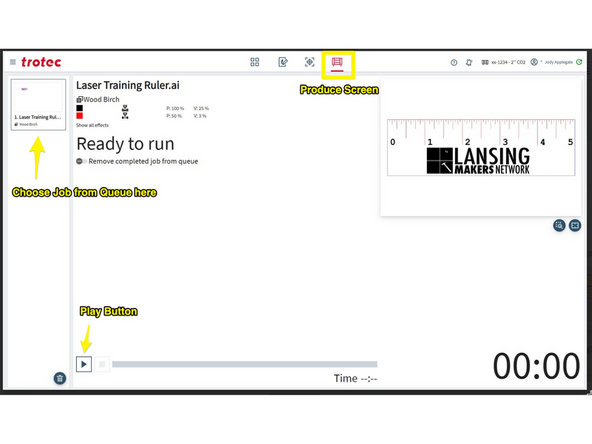
Click the Produce Tab, and wait for the action window to pop up.
-
Select your job from the left hand sidebar. New jobs populate at the bottom of the list.
-
Turn on the secondary exhaust fan by hitting the switch on the wall behind the laser.
-
Once the job is complete, open the lid, remove your project.
-
Turn off the secondary exhaust fan.
-
Proceed to Section 02: Shutting down the laser
-