-
-
Loosen the angle lock knob by turning the handle down (toward the ground).
-
Grasp the table handle and rotate the handle toward you to ensure that the fence is resting against the 90 degree angle stop.
-
If the fence slides past 90 degrees, the angle stop block has been flipped up. Locate the angle stop block on the top of the fence support and flip it back down to adjust the fence to 90 degrees.
-
If using the jointer to create a chamfer or bevel, set the angle to your desired bevel instead of 90 degrees. It is highly preferred to tip the fence toward you instead of away from you as it provides much more stability to the material.
-
If using the jointer to create a chamfer or bevel, set the angle to your desired bevel instead of 90 degrees. It is highly preferred to tip the fence toward you instead of away from you as it provides much more stability to the material.
-
-
-
Loosen the fence position lock lever by turning the lever to the right.
-
Grasp the center of the fence and slide it forward or backward to adjust the position of the fence.
-
If you slide the fence too far back, the locking knob will rotate below the support, preventing the table from moving forward again. Rotate the knob up far enough to clear the table while you pull it forward.
-
Position the fence such that as little of the blade is exposed as is needed to perform your operation.
-
Exposing more of the blade than is needed can increase the chance of injury should a kickback occur. Small nicks in the knives can also be avoided by adjusting the fence position to avoid them.
-
Tighten the fence position lock by rotating it to the left. Tighten the lock firmly, but only hand-tight.
-
-
-
Locate the infeed table locking knob on the front of the machine, to the right of center.
-
Loosen the table locking knob by turning the knob counter-clockwise. Only a small amount of turning is needed (no more than one turn).
-
Be sure you’re performing the following steps on the infeed (right) side of the machine. The outfeed (left) table is adjusted to be in line with the blade and should not be readjusted.
-
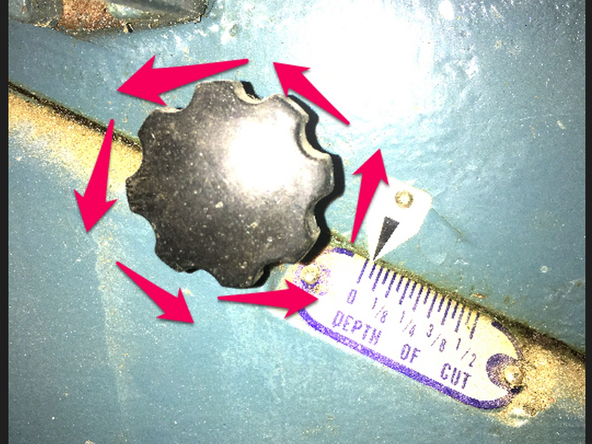
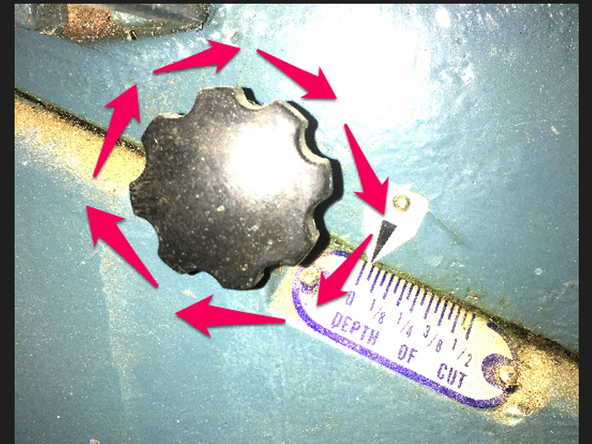
Turn the infeed table adjustment wheel to adjust for the desired depth of cut.
-
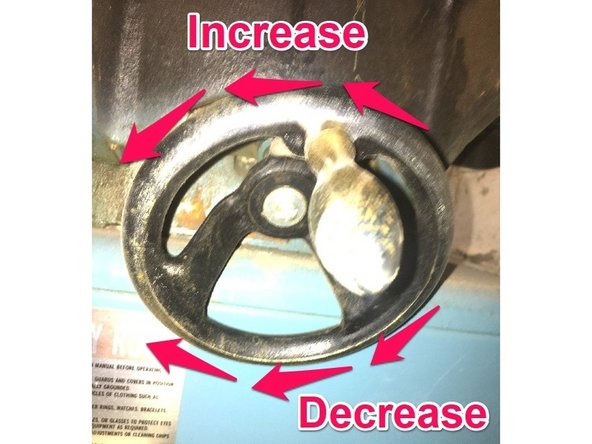
Turn the wheel counter-clockwise to lower the table and increase the depth of cut.
-
Turn the wheel clockwise to raise the table and decrease the depth of cut.
-
-
-
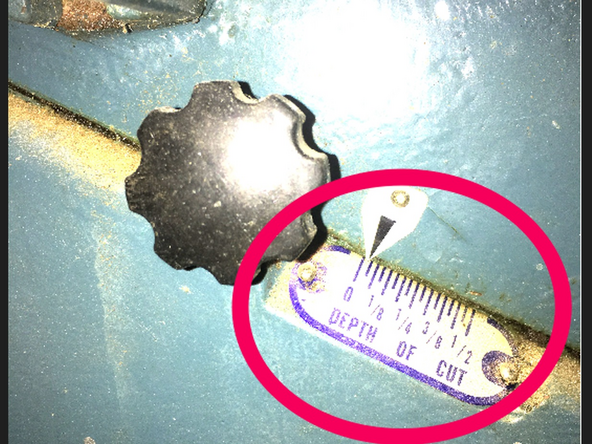
The scale below the table locking knob shows the current depth of cut.
-
Small cut depths are generally better for most operations on the jointer. Setting the jointer to 1/16” or smaller and taking multiple passes ensures you’ll waste as little material as possible.
-
Tighten the table locking knob by turning it clockwise until tight.
-