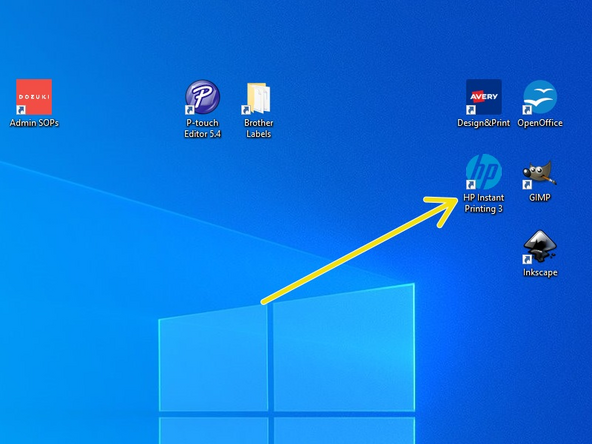
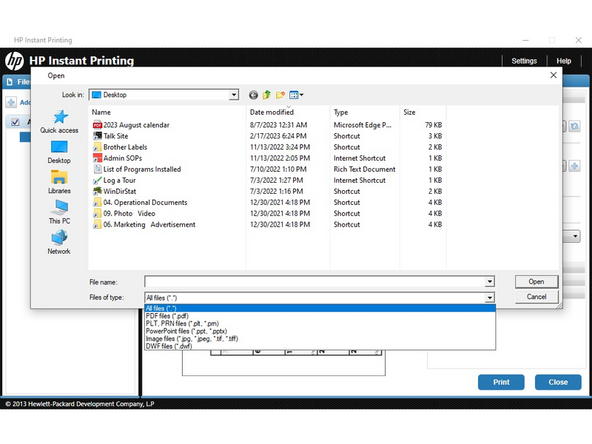
Tools
Parts
No parts specified.
-
-
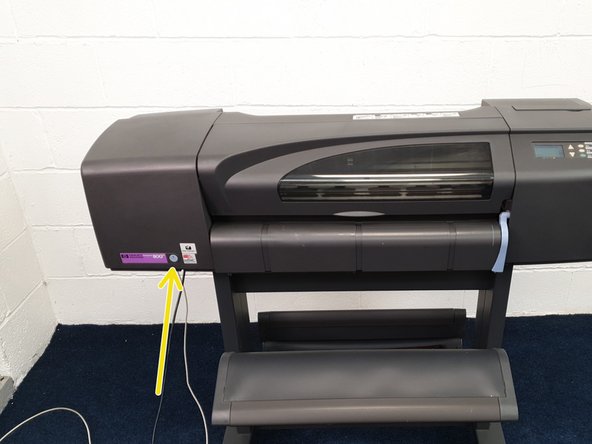
Turn on the DesignJet 800 by pressing the blue button on the fron left side of the printer.
-
Push the paper collection bin down. It will make a scary crack! noise.
-
-
-
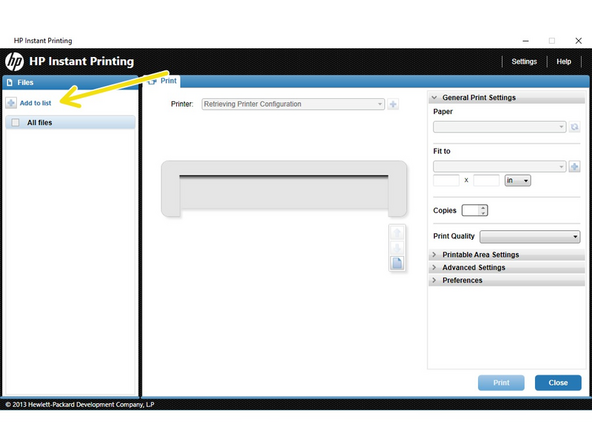
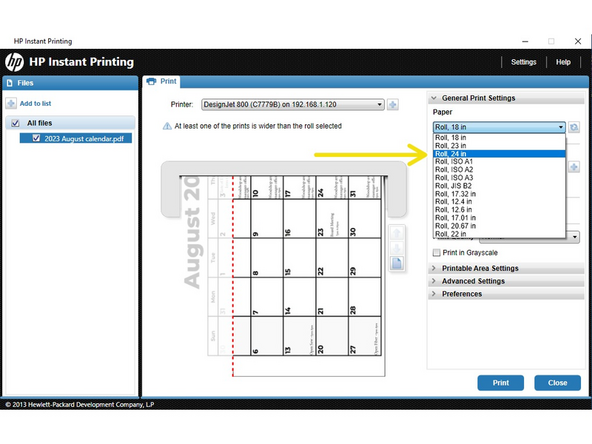
Click the 'Paper' drop-down menu and click "Roll, 24 in.'
-
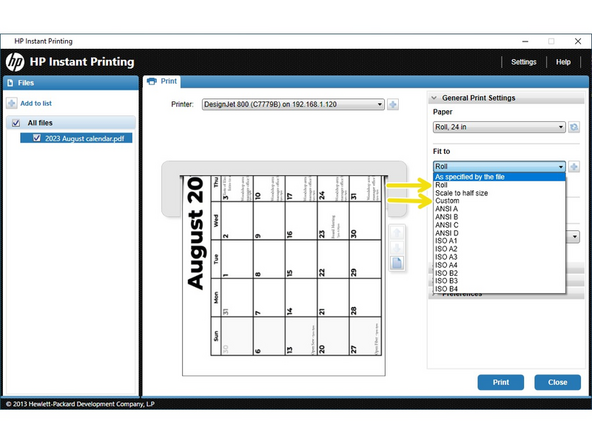
Click the 'Fit to' drop-down menu and then click:
-
"As specified by the file" to print by the file settings.
-
"Roll" to print as large as possible.
-
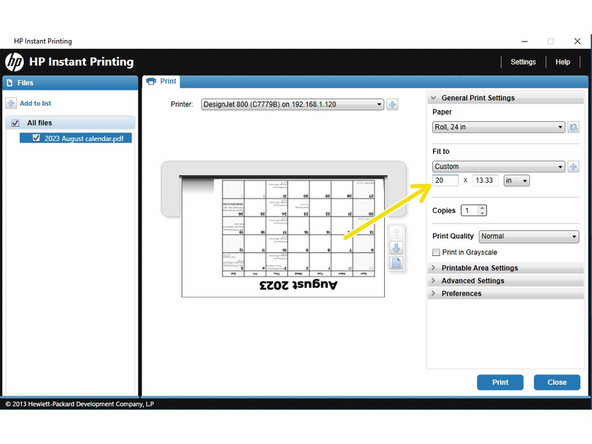
"Custom" to manually adjust the print size.
-
If "Custom" is chosen, enter the chosen height in the dimension area below the "Fit to" drop-down. The other measurement will be calculated to maintain aspect ratio. The software will also autorotate as necessary to save paper.
-
-
-
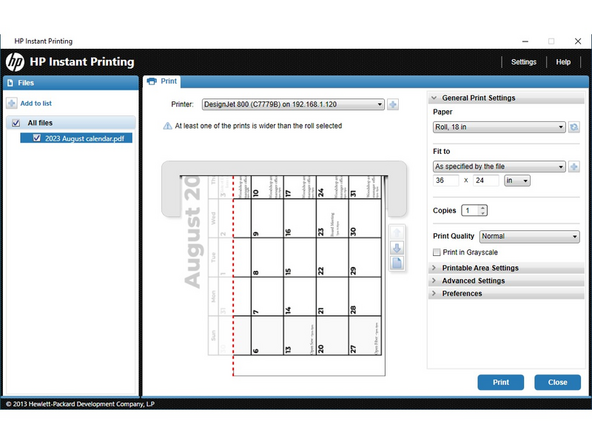
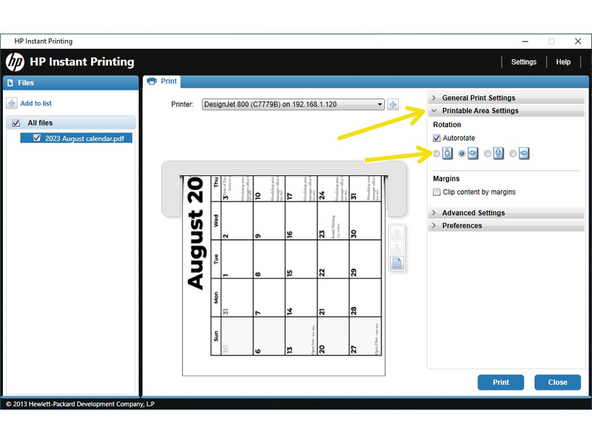
If the image doesn't appear as desired, click "Printable Area Settings" and set the necessary orientation.
-
-
-
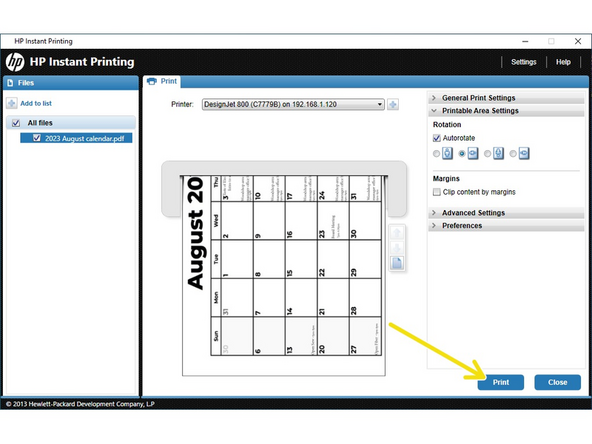
Click "Print". The file will be sent to the printer. The printer takes a while to process complicated or large images. It will start eventually.
-
-
-
If a change of ink or paper is needed, please reference the printed documents on the left side of the printer under the spare ink cartridges.
-
Cancel: I did not complete this guide.
One other person completed this guide.