-
-
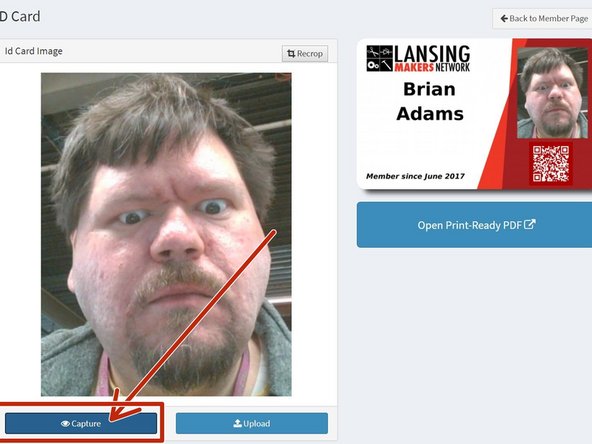
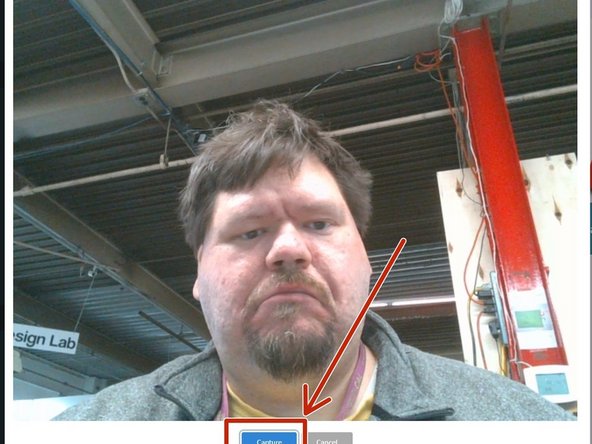
Click "Capture" to open the webcam dialog
-
Ask the member to stand on the black cross taped on the floor in front of the front desk.
-
-
-
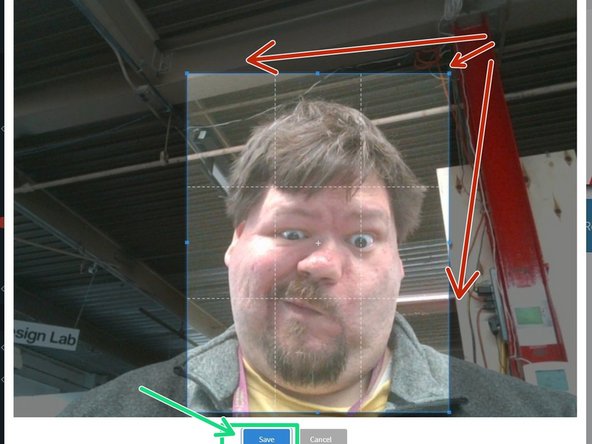
Adjust the cropping box to create a pleasing ID card photo
-
Click "Save"
-
-
-
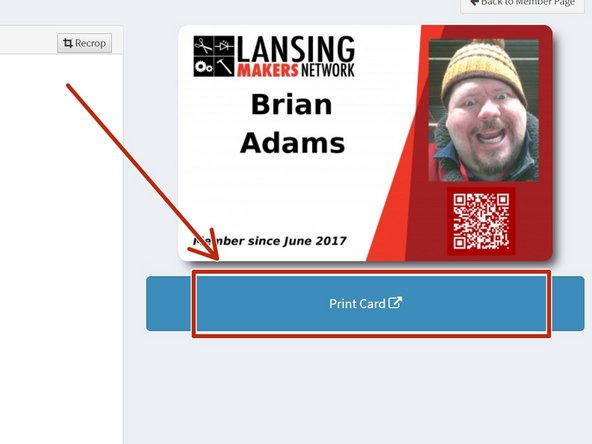
Click "Print Card"
-
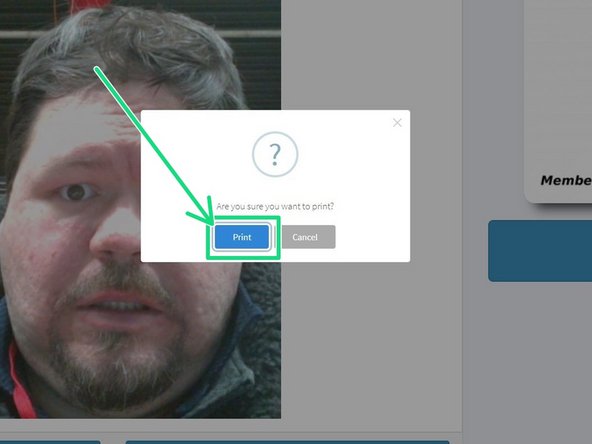
In the modal that opens click "Print"
-
It may take a moment or two for the file to print (the system is generating a PDF which takes time).
-
-
-
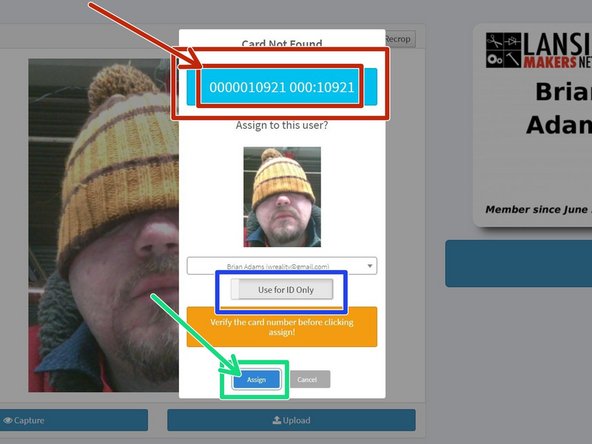
When the card has finished printing, swipe the member's new card.
-
If you swipe the card from the ID card page, the portal will assume you want to attach any unknown card to the current user.
-
Confirm that the card number detected matches the card number on the back of the card.
-
If this card should also be used for access control (door access) toggle the "Use for ID Only" option to "Access Control"
-
Only one RFID key can be used for access control at a time. If you add a new card for access control previous cards will be disabled for access control (but will remain attached to the member's account)
-
Click "Attach"
-
-
-
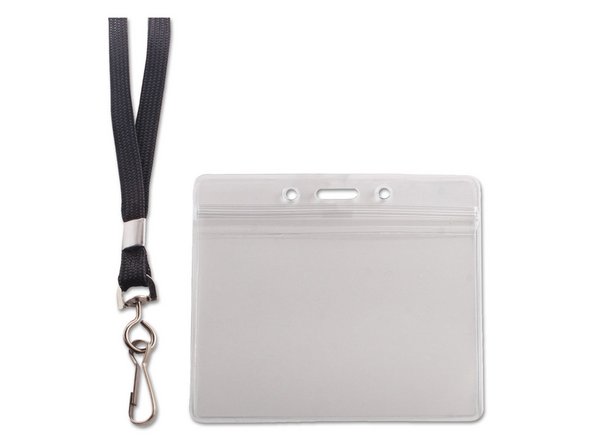
Place the ID card in a badge holder.
-
Members can choose between a lanyard or a badge clip.
-
Warn users of lanyards to be careful to remove the badge when working with machinery. While the lanyards have a breakaway feature, they should still be stowed when using machinery.
-
Cancel: I did not complete this guide.
One other person completed this guide.


