Difficulty
Moderate
Steps
16
Time Required
- Long Arm Quilting Machine SOP 16 steps

User-Contributed Guide
This guide is not managed by the site's staff.
Quiz
0
-
-
Turn off machine using switch when dusting, oiling, changing the needle, or loading the bobbin.
-
Unplug and turn off machine when not in use
-
Needles are sharp. Keep your fingers out of the way and be mindful of where you are sewing. Dispose of worn or broken needles in the sharps container. Ensure pins are not left out.
-
Avoid things catching in the motor or moving parts- Tie back hair, no dangling clothes or jewelry, no loose sleeves. Both the main motor and the bobbin mechanism are exposed when running.
-
The machine gets loud at high speeds. It is not recommended to run above speed 7, wear hearing protection if necessary and be mindful of other members.
-
-
-
Use only with appropriate materials- no thick thread, heavy fabrics, or extremely fuzzy fabric. If you are unsure if your fabric is appropriate, ask the area manager.
-
The machine is very sturdy. There are not many things you can do to permanently damage it. The most important thing to keep it running is keep it clean and do the required maintenance steps every time.
-
No ruler quilting. The machine does not have the needed supports to accomplish this safely.
-
No adhesive basting or anything else sticky.
-
-
-
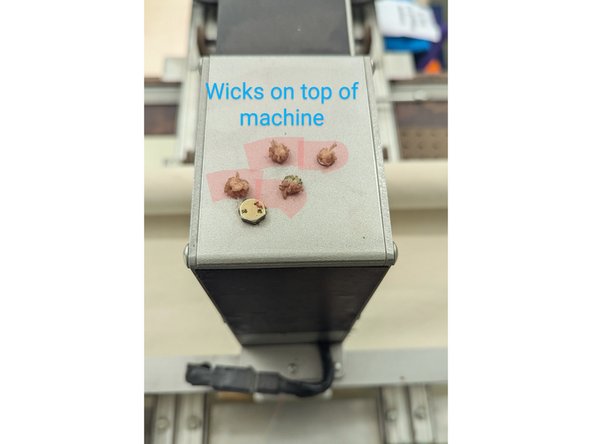
Before starting the machine, and every 4 hours of running time apply 1 drop of sewing machine oil to each of the 4 wicks on the top of the machine.
-
Brush out any lint from the bobbin assembly area. Spray out with WD40, then run the machine at low speed for 30 second to throw off excess.
-
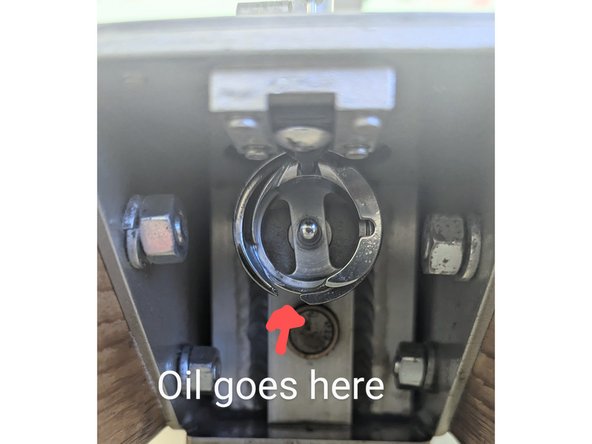
Apply 1 drop of oil to the hook of the bobbin assembly. run machine at low power for 30 seconds.
-
Sew on a scrap fabric to clean up excess oil.
-
Check for lint accumulation periodically, especially if using cotton, low quality thread, or very linty material.
-
-
-
rollers, leader cloth, and roller latches. rollers are numbered 1-3, with 1 being the roller inside the machine. Leader cloth is the canvas fabric wrapped around them.
-
On the body of the machine: wheel to move the needle manually, speed control dial, light switch, bobbin case, bobbin hook race (this holds the case), needle bar, presser foot
-
front and rear handles with buttons for starting and stopping.
-
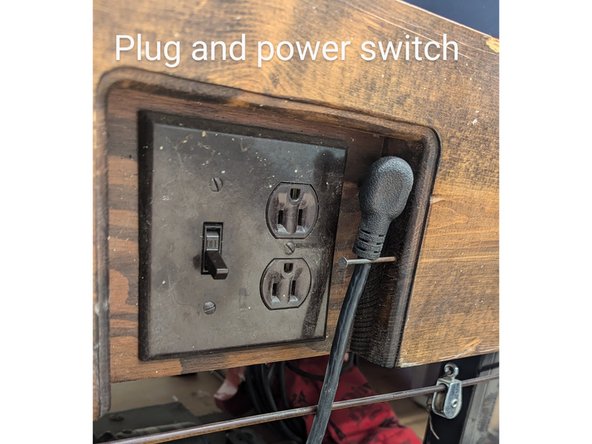
Plug and power switch.
-
Carriage, carriage wheels, channel lock angle
-
-
-
Replace the needle if bent, when visibly dull, or if you can hear it pop when entering the fabric.
-
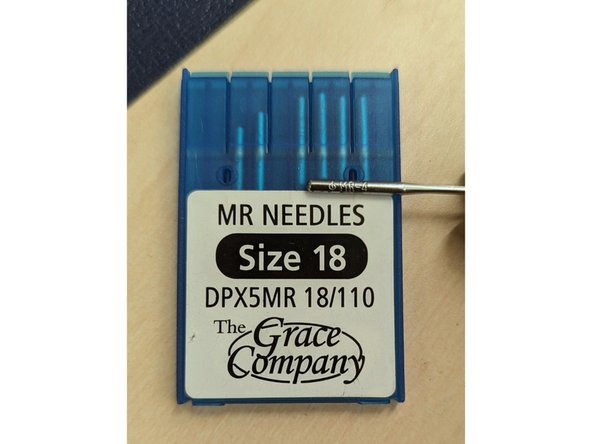
Only use MR4 or 'muva 135x7' needles. The case will not always be specific, but the needle will say mr4 on it.
-
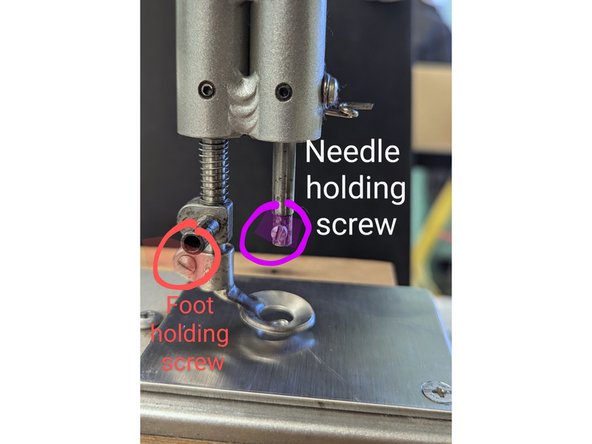
To replace the needle, ensure the motor is unplugged. unscrew needle holder, remove used needle and dispose in the sharps tub. Do not replace used needles in the needle case.
-
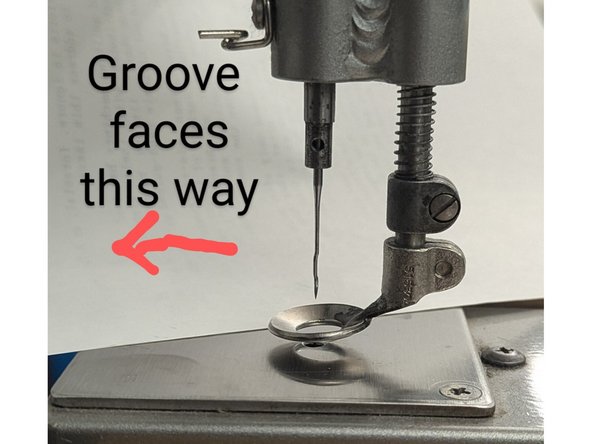
Insert new needle with the large groove facing away from the body of the machine and tighten the screw. Check to make sure the needle is tightened, straight and facing forward.
-
-
-
Use only bobbins that fit flush in the bobbin case.
-
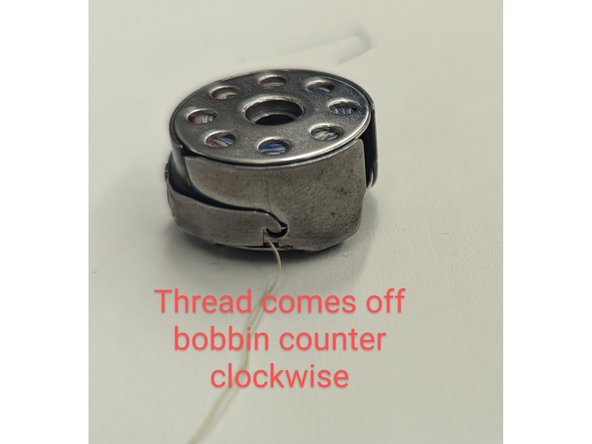
place bobbin in the case so the thread comes off counter clockwise, and pull the thread through the clip.
-
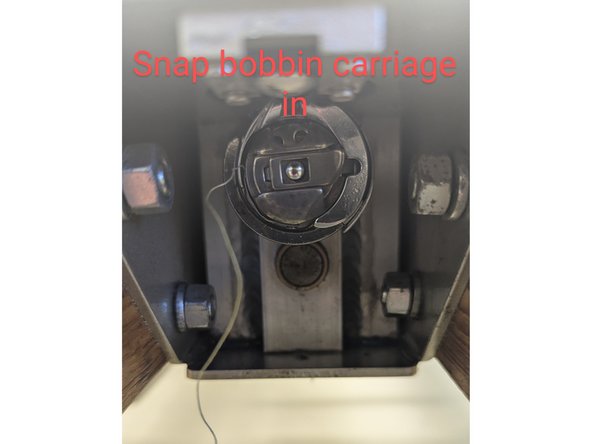
Seat the bobbin case in the bobbin assembly.
-
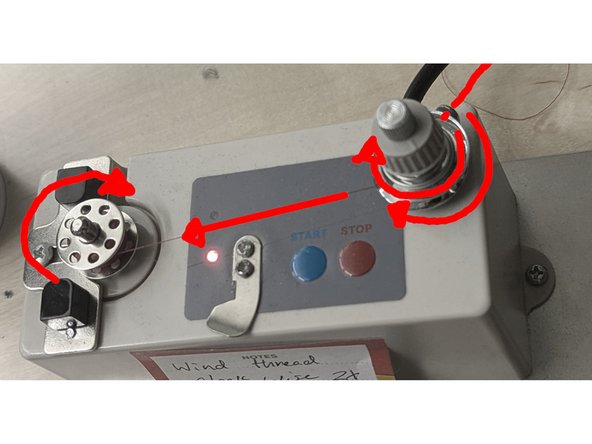
Bobbin winder is threaded through the top hook, through the small hole, into the tensioner then wrapped 2x around the tensioner. Wrap the thread around the bobbin a few times to give it a good start. Press the start button. Winder will automatically shut off when bobbin is full.
-
Do not use the sewing machines to fill the bobbins, they do not fit and will get stuck.
-
-
-
The best thread to use is smooth polyester. Serger thread is not recommended. Using quality thread will help your quilt be a success
-
Set the tension with the dial. Tension depends on how fast you quilt and the thickness of your batting, as well as the thread you are using.
-
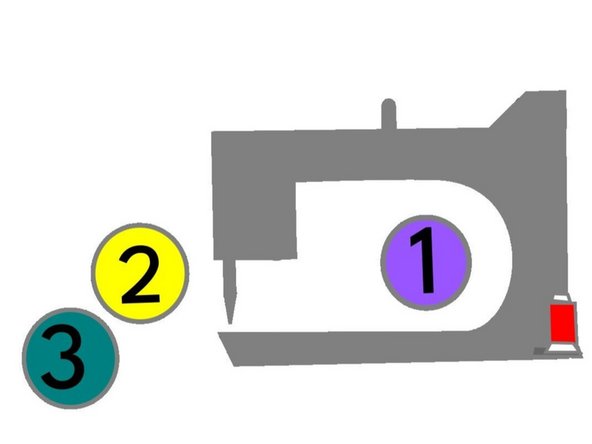
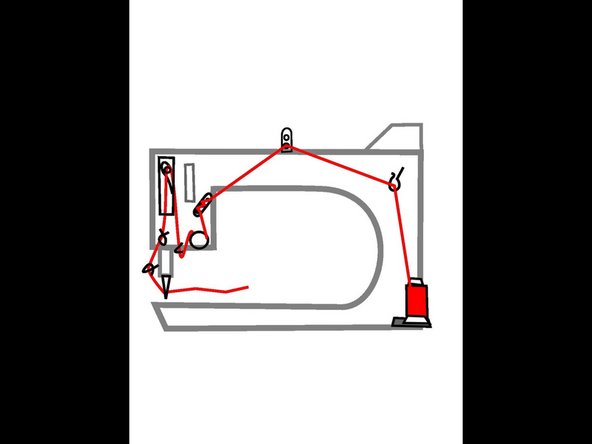
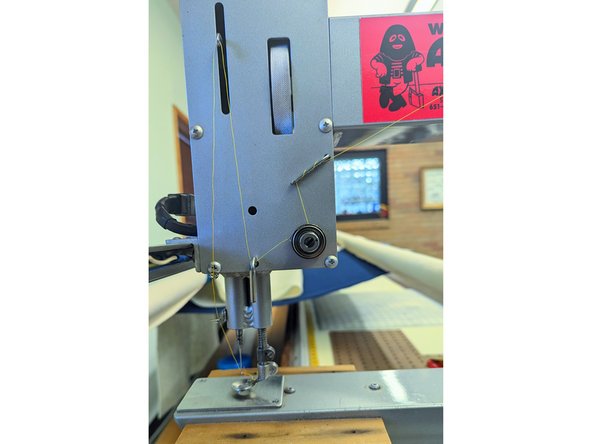
Thread the machine in the order shown on the diagram. the needle should be threaded front to back.
-
For the two hole tab on top of the machine, put the thread through one hole. it doesn't matter which hole. The second hole is only needed if you need extra tension after adjusting everything else for specialty threads and can generally be ignored.
-
The three hole tab should have every hole filled in a spiral pattern. the first hole can be skipped if less tension is required after all the other options have been tried.
-
the color of thread can be changed by cutting the thread and tying a knot to the new thread, then pulling it through.
-
Cotton, poly core, invisible, and metalic threads can also be used. Thin decorative threads may be easier to use if doubled up, using the second spool holder.
-
-
-
There are many ways to load a quilt. The top can be pinned on two, one, or no sides. The backing is pinned down on both sides.
-
Clamps can be used to assist in tensioning and alignment while loading.
-
Unlatch rollers and make sure they are pushed all the way to the side, in line with the gears, before loading.
-
Backing is pinned to roller #1 and roller #3. Quilt top is pinned to roller #2. Make sure backing fabric goes under roller #2 as you pin, not over.
-
do not sew on the leader cloths. If you want to install zippers or other faster loading methods, talk to the area manager first.
-
-
-
double check all pins are removed.
-
Do not pre-sandwich or baste your quilt. Each layer is individually loaded into the machine.
-
Make sure your top is flat, sturdy, and square:
-
Ensure enough seam allowance on all blocks as you sew, Measure and cut borders after all your piecing is assembled, If your quilt has no borders and is pieced all the way to the edge, stitch around the entire quilt ⅛”-¼” from the edges to prevent the tension of the rollers from pulling apart your pieces.
-
Batting should be 4" larger than your quilt top in both directions. this is to account for shrinkage and how the quilt is installed on the frame
-
if you are piecing together multiple pieces of batting, ensure they are flat and firmly attached.
-
Backing fabric should be slightly larger than your batting, by at least an inch on the side and 2 or more inches on the bottom. It will get shorter as you sew. It is better to have extra than run out.
-
On both ends of the backing fabric and quilt top, mark the center with a pin or marker.
-
-
-
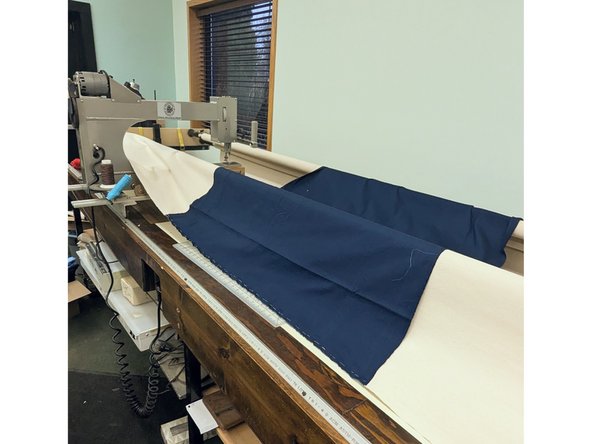
Place backing fabric wrong side up over the rollers. Line up center with mark on leader cloth on roller #1. Clamps can be used to hold it in place.
-
Pin entire edge of backing to edge of leader cloth, ensuring is is flat and even.
-
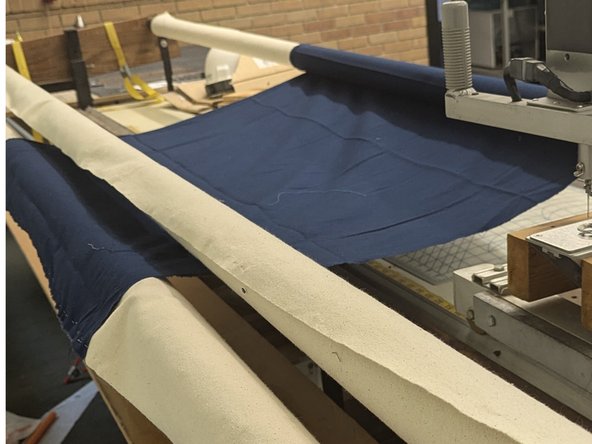
Pull loose end of backing under roller 2, then pin second edge on to leader cloth of roller #3.
-
Roll backing carefully onto roller #3, ensuring it is smooth and even.
-
-
-
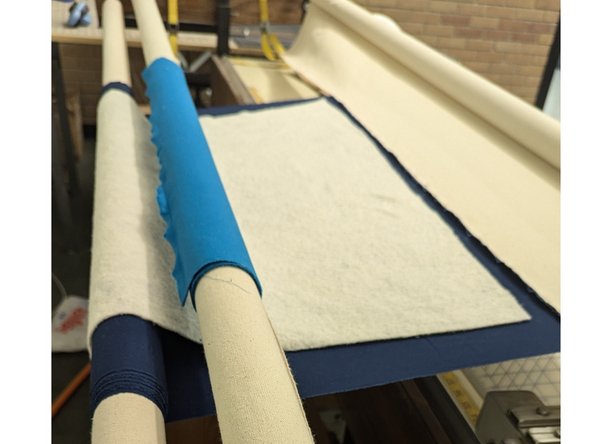
Pin quilt top to leader cloth on roller #2. Roll up, ensuring it is square and even.
-
Engage roller latches and tighten the quilt back.
-
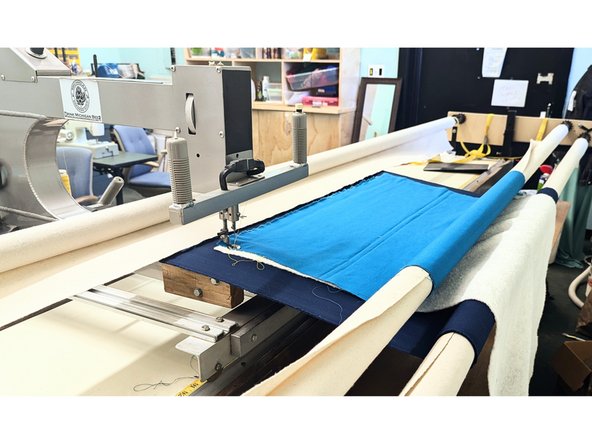
Slide batting between rollers #2 and #3. Line up and rest the batting on the backing. It can be basted or pinned if you want.
-
Sew a straight line across the top to hold all layers in place.
-
-
-
plug in the machine and turn on the power. Move the carriage to your desired starting position.
-
Set the speed control dial to the desired speed.
-
Standing either on the front or back, press the button on the handle to start. the needle will start immediately and should be kept moving across the fabric whenever it is running.
-
Press the button again to stop. it will take a few stitches to stop fully.
-
-
-
Stop sewing about an inch from the front of the frame.
-
Raise the needle using the wheel until the tension is fully released. Move the carriage off to the side and snip threads.
-
Release roller latches, roll quilt forward until about 1" of the quilted part is showing.
-
Engage roller latches and tighten the quilt.
-
-
-
To remove the finished quilt, unpin from the leader cloth, then roll off and unpin the other side.
-
Return pins to their home, put any bent ones in the sharps disposal.
-
Roll leader cloths back up.
-
Unplug and turn off the machine. Brush away any lint.
-
Your quilt can be reloaded after partial quilting, just make sure everything is square and flat. If you run out of backing material, you can sew on another strip and reload it.
-
-
-
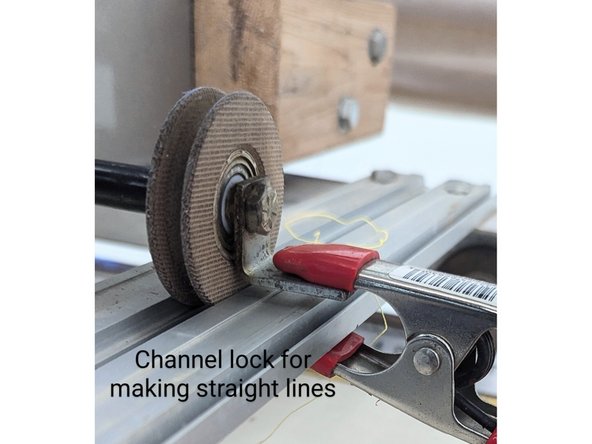
The channel lock can be held down with the clamps to make straight lines.
-
the stylus is missing, but can be used to trace patterns that are set on the table. be very careful if you try this, since it takes your eyes off of the quilting.
-
-
-
If you get puckers or folds in the fabric, pick them out and smooth the fabric back out, and you may want to tighten the fabric on the frame.
-
If the thread keeps breaking, check that everything is threaded in order, that your tension and speed are appropriate, and that the needle is in good shape. Some threads will not work with the machine for unknown reasons, try a different thread.
-
If something breaks or is not working on the machine, post on the talk site describing the problem and troubleshooting steps you have taken, or contact the area manager.
-
do not try to adjust the timing or motor belts.
-