Difficulty
Moderate
Steps
5
Time Required
- How to Use Prusa Slicer 5 steps

User-Contributed Guide
This guide is not managed by the site's staff.
Quiz
0
-
-
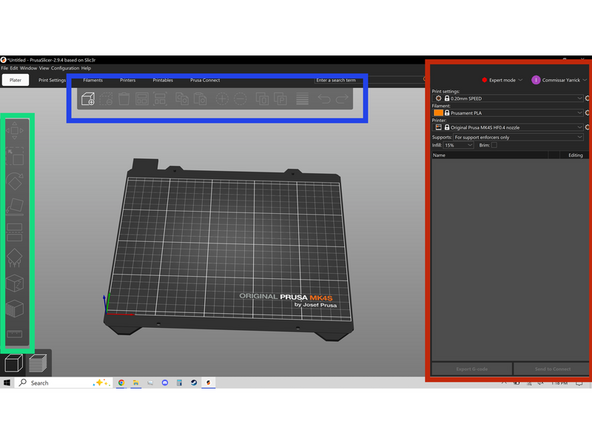
Double click Prusa Slicer on the desk top to open it. It should look the first image.
-
There are three areas that will be discussed, the top tool bar, on the top of the screen, the left tool bar, on the left of the screen, and the printer profiles and settings, on the right side of the screen.
-
These tool bars and setting will be discussed in greater detail in the following steps.
-
-
-
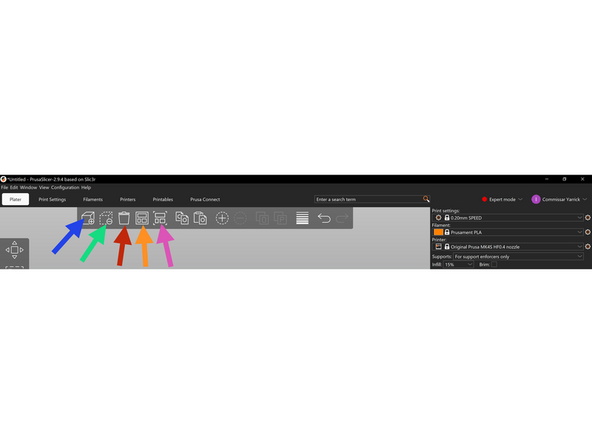
The top tool bar focuses on manipulating multiple objects on the build plate.
-
The first tool is Add Object, this lets us add the files we want to 3D print to the build plate. The second tool is Remove Object, this allows us to remove the files from the build plate. The third tool is Delete All, this allows us to remove every file on the build plate.
-
The fourth tool is Arrange, it automatically arranges all files loaded as efficiently as possible using up to nine total build plates. The fifth tool is Arrange Current, which arranges the currently selected build plate.
-
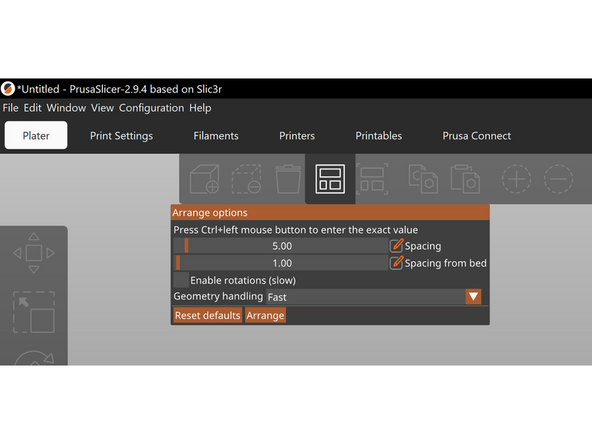
You can right click either arrange tool to open the arrange options menu, seen in the second image, and change settings like the minimum allowable spacing between objects and enable rotations that may allow for a more efficient use of space. A greater explanation of the multiple build plates will be included later in this SOP.
-
-
-
The next two tools are Copy and paste, These tools allow you to copy an object with all of its current settings and paste it somewhere else.
-
The next two tools are Add Instance and Remove Instance, which add multiple instances of the same object with all settings changing if they are changed on one instance. I.E. if you add supports to one instance, supports will be added to all the instances.
-
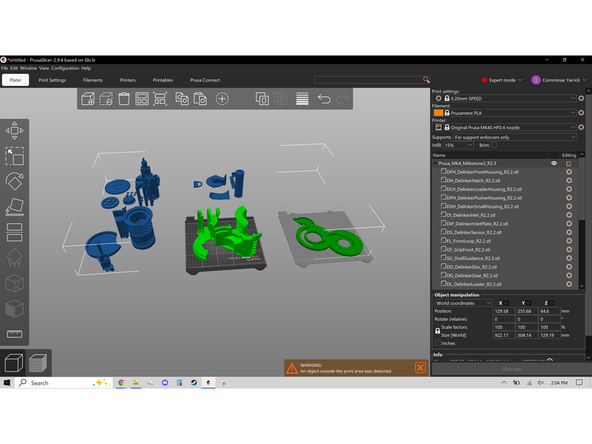
The next tool is Split To Objects, this tool is useful when one 3D print file is multiple objects, like the second image, that must be split apart to be printed. More technically it splits that file into its separate shells, or fully enclosed areas in the file, and drops them to the build plate.
-
The next tool is Split to Parts, which similarly separates a 3D print file into multiple objects, but keeps their initial position and treats all of them as the same object. Essentially, this tool is meant to be used with a multicolor 3D printer to color models that are already broken into separate sections.
-
-
-
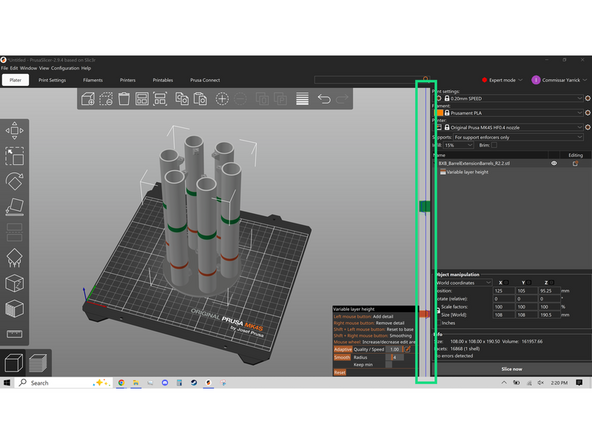
The Next tool is Variable Layer Height, which lets us change the height of each layer printed, rather than keep them all the same height. This tool is useful for making some layers larger which lets them print faster while keeping the functional part of a model exactly the same or smaller.
-
The Variable Layer Height menu, shown in the second image, lets you use left and right click, in the column on the right highlighted in green, to make the layers short or taller respectively. The sections highlighted green are shorter and the sections highlighted red are taller.
-
it should be noted that the use of this tool disabled the use of organic supports, which will be explained in detail later in this SOP.
-
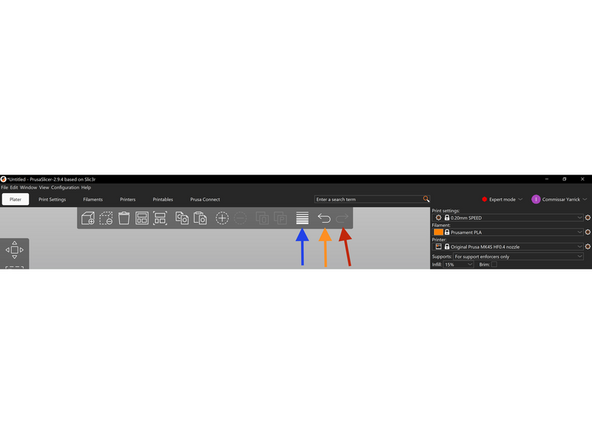
The last two tools are Undo and Redo, which undo the last action performed or redo the last action performed respectively.
-
-
-
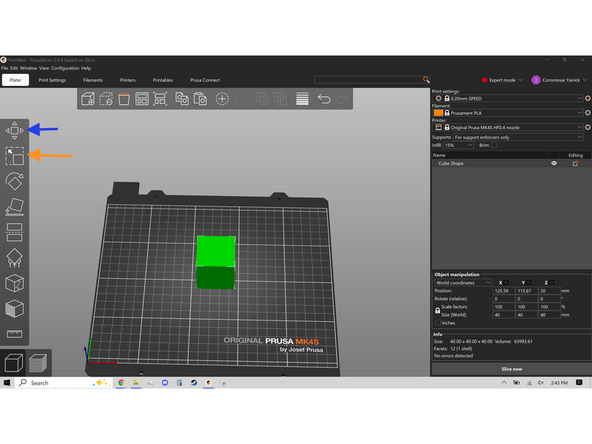
The left tool bar has tools for fine manipulation of a single object. You must have an object selected to use most of these tools. to select an object left click it and it will highlight green like the first image.
-
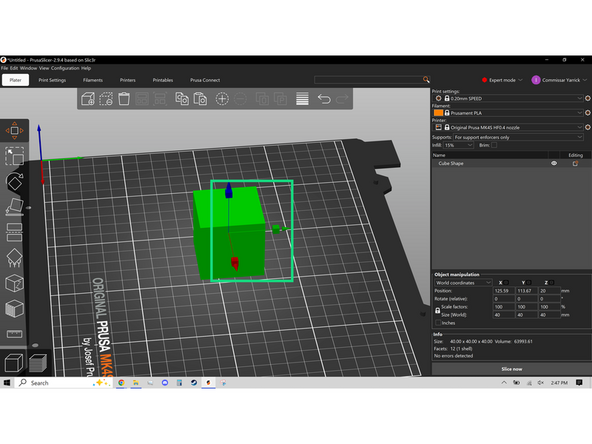
The first tool is Move, which allows for free movement of an object by grabbing it with left click, or precise movement along the X, Y, or Z axis by grabbing the gnomons, highlighted in the second image.
-
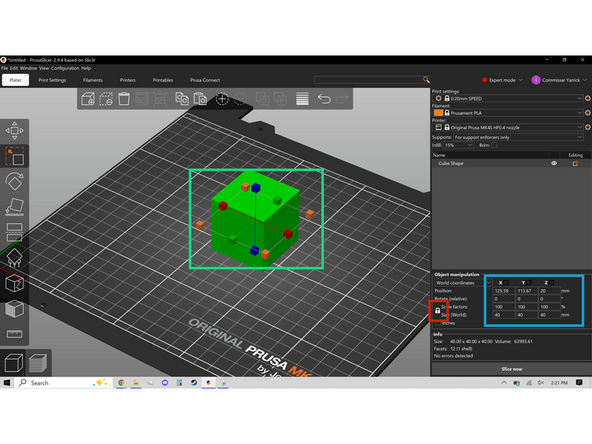
The Second tool is Scale, shown in the third image, allows you to stretch the object in X, Y, and Z axes or all three at once, if the world scaling factors are unlocked, which can be done by left clicking the padlock highlighted in the third image. Scaling is done by grabbing the gnomons.
-
If scaling by a percentage would be easier specific numbers can be entered in the scale factors, highlighted in the third image.
-