Difficulty
Moderate
Steps
6
Time Required
- EverSewn Sparrow 15 6 steps

In Progress
This guide is currently being written. Reload periodically to see the latest changes.

User-Contributed Guide
This guide is not managed by the site's staff.
Quiz
0
-
-
Place the spool of thread on the pole at the top of the machine and put a cover on it to keep the thread from pulling off.
-
Turn on the machine by pressing the button on the far right side.
-
-
-
There is a dotted line printed on the machine which shows where the thread should go.
-
Pull the thread through the first loop (it's open so pull front to back and it will slide in).
-
Pull the thread around the wheel from the top, counterclockwise.
-
Push the thread through the small hole in the bobbin (to hold the thread while you start winding).
-
Put the bobbin on the the bobbin holder and push to the right in the track. This disengages the needle and spins the bobbin winder instead.
-
Hold the end of the thread coming out of the bobbin and push down on the presser foot. The bobbin will wind until it is full, then stop on its own.
-
Remove the bobbin from the holder and slide the holder back left to reengage the needle.
-
Repeat the previous steps as necessary if you'd like to have more wound bobbins.
-
-
-
You should have a wound bobbin from the previous step.
-
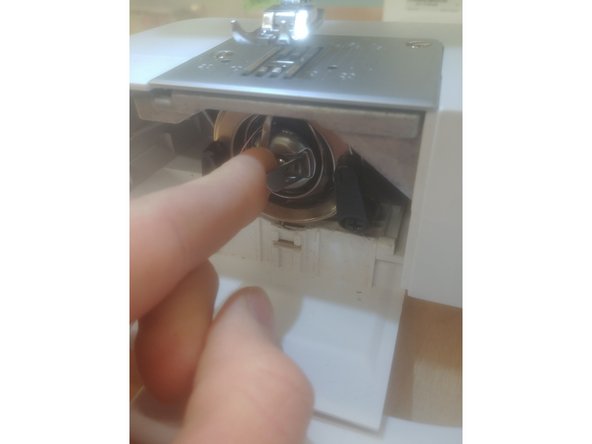
Slide out the case at the bottom of the machine by pulling it to the left. Open the small door directly below the needle by pulling forward.
-
The bobbin casing has a small metal lever on front. Pull that and the bobbin casing will come out with it. Remove the bobbin which is currently in the machine.
-
Place your wound bobbin in the bobbin casing. With the opening of the casing towards you, the thread should be coming out in a counterclickwise direction (the same direction as the small groove cut in the bobbin casing).
-
Pull the bobbin thread through the groove until it comes out the hole in the bobbin casing. If you pull the thread now, it should come out smoothly, with a little resistance.
-
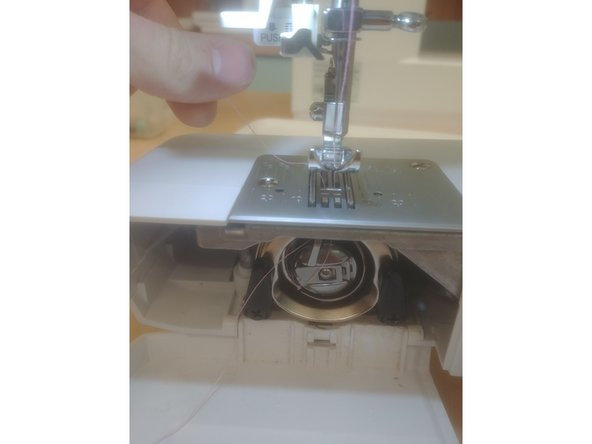
Replace the bobbin casing by pulling the tab and setting in the machine. Once the tab is released, it should sit loosely, but with a limited range of motion.
-
Close the cover and replace the base.
-
-
-
There are solid arrows printed on the machine which the thread should follow for these steps.
-
If you wear reading glasses, put them on now.
-
Pull the thread left through the hook (set in a groove) at the top of the machine, then pull towards yourself.
-
Pull the thread down the front face of the machine, then through the groove and back up. This looks like a small flap on the front of the machine.
-
There is a hook in the groove to the left of the tab. If you can't see the hook, use the wheel on the right to spin the needle, thus bringing the hook up. Loop the thread through this hook.
-
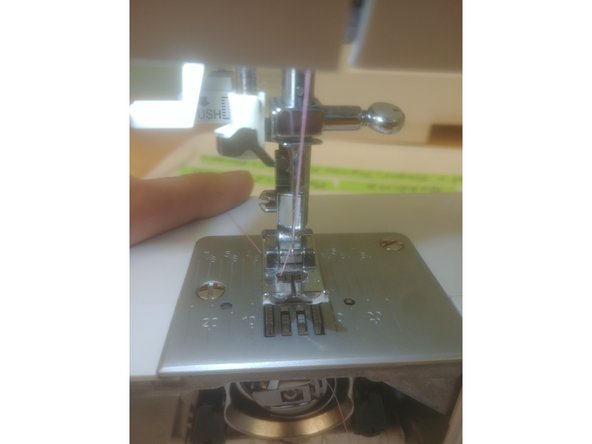
Finally, bring the thread back down and thread it through the needle. You may need to cut the thread again with sharp scissors, or lick the end slightly to hold down any loose fibers making it hard to thread the needle.
-
Once the needle is threaded, hold the end of the thread tightly and spin the wheel on the right of the thread to bring the needle into the machine and back up. This will loop around the bobbin thread and pull it up with the needle.
-
Once the needle is clear, continue to hold the end of the thread and slide something under the needle and pull until the bobbin thread is up. You should now have two threads trailing off the back of the machine from the needle.
-
-
-
You are welcome to change the dials as you see fit to experiment or as needed for different projects or fabric types.
-
You likely will not need to change tension dials very often (but you may when working with different weight fabrics). As per the manual, the far left dial (4, which controls thread tension) should be set to 4 usually.
-
The stitch dial (1) has diagrams on it which set the stitch. The dashed straight line controls is for a straight stitch. You should start with this.
-
The dial above the stitch dial (2) is numbered 0-5. This sets the length of each stitch. Somewhere between 1 and 2 is probably a good start
-
The top right dial (3) controls how wide your zig-zag should be. Set this to 0 for a straight stitch.
-
-
-
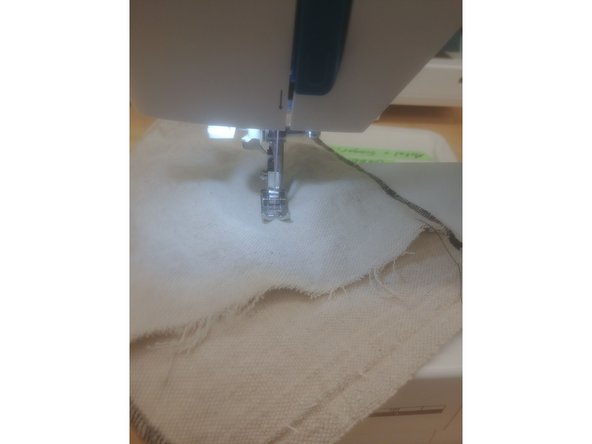
Slide your fabric into the machine, under the needle.
-
Lower the presser-foot by pulling the lever at the back of the machine down. The foot should slap down.
-
Press down with your foot and have fun. Remember to let the machine pull your fabric through the machine, don't push or pull the fabric through on your own.
-
If the machine jams, do your best to pull all the thread and fabric out of the area above the bobbin casing. Use the wheel on the right of the machine to move the needle and bobbin if things are caught on it. You may need to rethread the machine or bobbin afterwards.
-