Difficulty
Moderate
Steps
4
Time Required

User-Contributed Guide
This guide is not managed by the site's staff.
Quiz
0
Introduction
A crosscut is a cut that slices across the grain direction of a piece of wood. A miter saw generally works much better for cross cuts and is located at behind the SawStop table saw in the woodshop.
-
-
With the plastic guard on, be sure the blade angle has been set back to vertical (unless you intend to make an angled cut). The blade should protruding be 1/8” to 1/4” higher than the height of your stock. Setting the blade any higher only increases the chances of injury.
-
Check that the blade, blade guard, table insert and all other parts are securely fastened. If any part seems loose, or you are unsure if it is correctly secured, STOP and ask for help.
-
You do not use the fence for cross cuts. Lift the fence handle and slide it to the far right end of the table.
-
-
-
Insert the end of the miter gauge into the slot in the table and slide the miter gauge onto the table.
-
If the table behind the SawStop table saw is not level with the table saw, kick the legs in until the miter gauge slides to the top of the back table.
-
The fence and the miter gauge should not be used together. Doing so provides a way for the work to bind against the blade and kickback forcefully.
-
-
-
Unlock the miter gauge by turning the handle counter clockwise.
-
Adjust the angle of the miter gauge using the pointer to select the angle, or use a sample of your angle against the miter slot.
-
When using a sample angle or a square to set the gauge, compare the angle to the miter slot, not the blade for the most accuracy.
-
Lock the miter gauge in position by turning the handle clockwise.
-
Slide your piece forward and align your pencil mark with the side of the blade you wish to cut on. Make sure you are looking at the largest tooth of the blade.
-
Hold your piece securely against the miter gauge and pull the miter gauge back to the edge of the table, away from the blade.
-
-
-
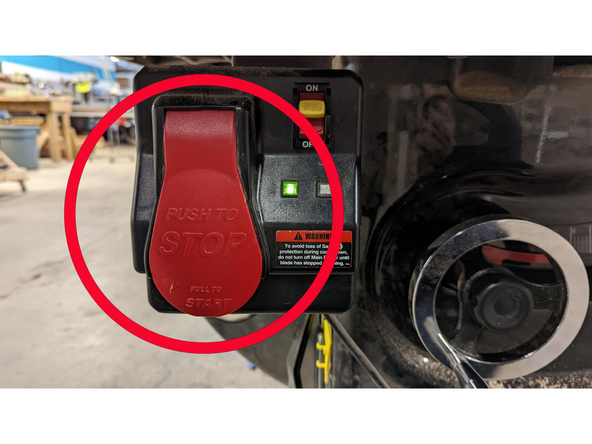
With your left hand, press the start button, grab the red handle on the miter gauge, and move your piece forward to make your cut.
-
Once the saw has cut through the entire piece, move the piece to the right (away from the blade) and slide the piece and the miter gauge back towards you.
-
Press the “STOP” button to and wait for the saw to come to a stop before moving to retrieve your work.
-