-
-
Complete the Setup SOP to
-
Set Fence Angle
-
Set Fence Position
-
Set Cut Depth
-
Inspect your material for any nails, screws or other metal. Use the metal detector located near the planer to be sure all metal has been removed. Wood from a big-box store will usually have staples in one or both ends. These must be removed.
-
Dirty or weathered lumber should be cleaned with a wire brush or sander prior to jointing/planing.
-
Metal and grit in material sent through the jointer is likely to chip or dull the blades. The blades will then need to be replaced leading to downtime and expense for the makerspace.
-
-
-
Check to see if your material is bowed or cupped along the dimension that you’ll be planing / jointing. When jointing bowed lumber, take care to place the concave side of the bow against the planer table and take very light repeated cuts. This will prevent the piece from rocking and result in a straighter final product.
-
Twisted boards present special challenges. If your board has a twist, ask for help if you’re unsure how to handle a particular twist.
-
A workpiece that extends above the height of the fence can be run through with your hands.
-
If your material is shorter than the fence of the jointer, you must use push sticks to run your material through the jointer. Be sure you locate the push sticks before moving on.
-
Turn on the dust collector and open the blast gate connected to the jointer.
-
The jointer must be run with dust collection. The jointer generates a lot of chips that will quickly build up inside the machine if dust collection isn’t turned on.
-
-
-
Turn the jointer ON by pressing the green power button on the control box.
-
Be sure to wait until the motor comes up to speed before moving on.
-
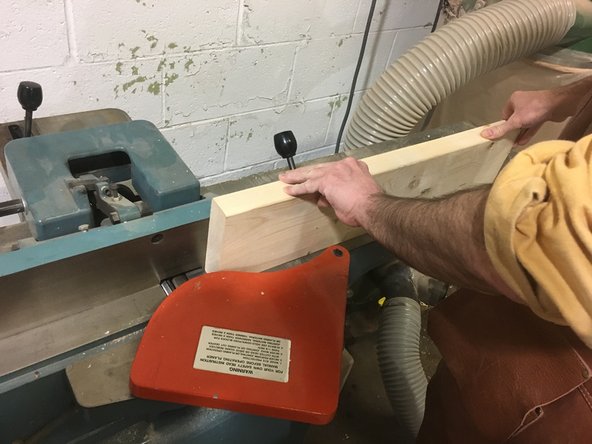
Begin feeding the material from infeed to outfeed (right to left) across the jointer.
-
Only use light downward pressure. Use your left hand to keep the face of the workpiece squarely against the fence, and use your right hand to push the workpiece over the cutter head.
-
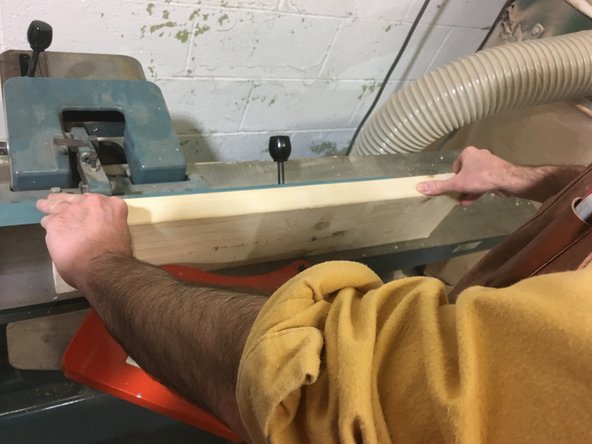
Feed the material over the cutter head, transferring your downward pressure to the outfeed table as soon as possible.
-
Take special care to avoid running your hands over the exposed area of the cutter.
-
-
-
Repeat the process of running your material of the cutter head until the edge of your material is sufficiently surfaced.
-
Material that is cupped or grossly angled could take many passes before the edge is completely cleaned up. Take your time!
-
Press the power off button on the power switch to shut off the machine.
-
The machine takes a fair amount of time to fully spin-down. Stay clear of the cutter heads until the machine has come to a complete stop.
-
Turn off the dust collector and close the blast gate connected to the jointer.
-
Friends don’t let friends leave blast gates open. Closed blast gates are happy blast gates.
-
Clean up after yourself, sweeping up any sawdust remnants and returning pushsticks to their storage locations. Don’t make the next user go looking for push sticks/pads!
-