Difficulty
Moderate
Steps
6
Time Required
- 01 - Start Up 6 steps

User-Contributed Guide
This guide is not managed by the site's staff.
Quiz
0
-
-
The machine requires compressed air over 90psi to operate.
-
Start the air compressor under the wood shop mezzanine by moving the large switch on the wall to "On."
-
The compressor will take several minutes to pressurize from empty.
-
-
-
Wipe dust off of the taper and flats of each tool holder in the rack.
-
-
-
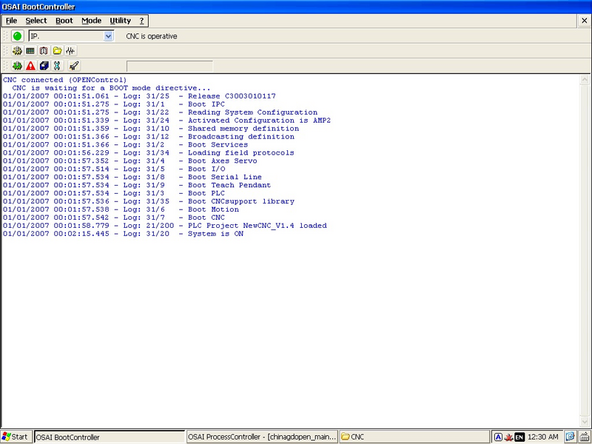
Press the illuminated "Power On" button on the main control panel.
-
Wait several minutes for the controller to boot up and present the "Main" screen.
-
The blue air drier and a solenoid valve to the air compressor are wired to the "Power On" button. When pressed, the drier should make a loud hiss as it discharges any condensation inside it, and there will be another sound of air filling the tank inside the machine when the valve opens.
-
-
-
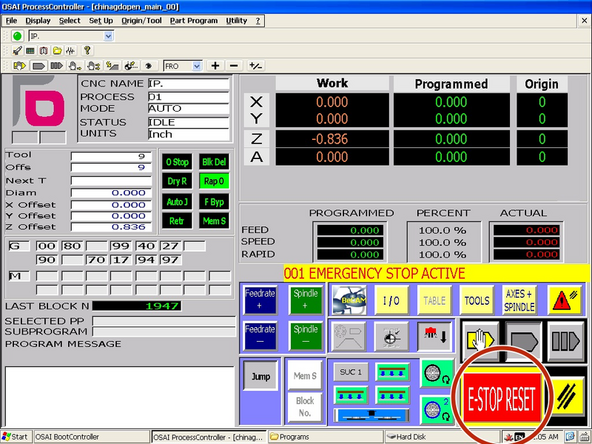
Click "E-Stop Reset" to clear the E-stop fault.
-
There will be another error if the compressed air pressure is still too low. The compressor may still need time to fully pressurize the system.
-
-
-
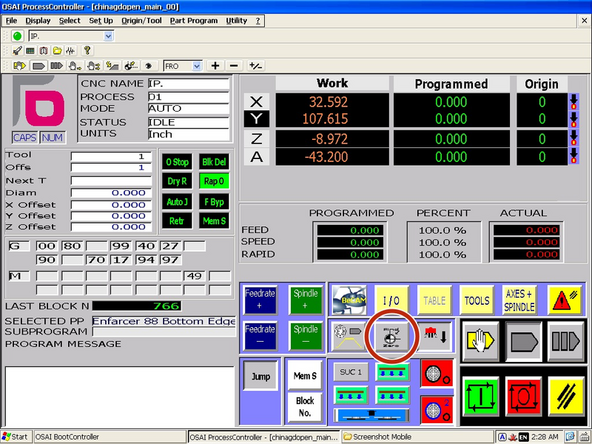
The following steps will cause the machine to move. Be sure again that the bed is clear and that nobody is in the movement envelope of the machine.
-
Click the "Find Zero" button on the main screen.
-
The machine will raise the spindle to the Z home position, then move X and Y simultaneously to the front left corner of the machine.
-
-
-
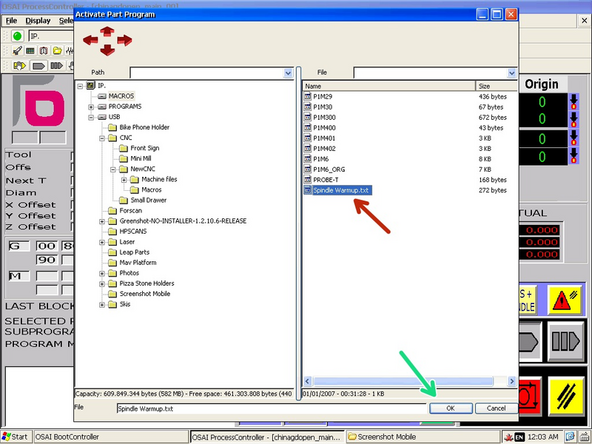
In the toolbar, click "Part Program" and then "Activate Part Program."
-
Navigate to the "Macros" directory and select the "Spindle Warmup" program.
-
Click "Ok" to activate the program.
-
The next step will cause the spindle and cutting bit to begin rotating at high speeds. Ensure that the area is clear.
-
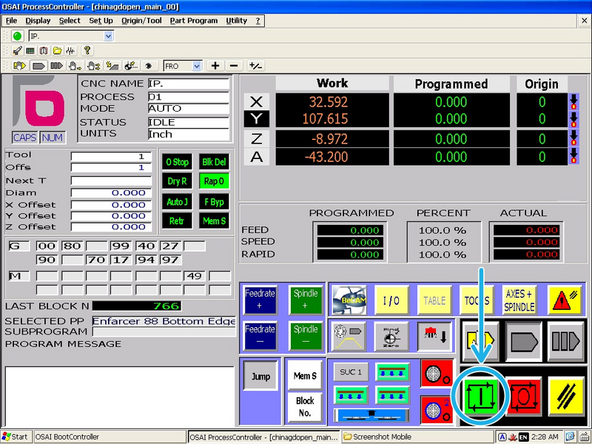
Click the "Cycle Start" button to begin the warmup program.
-
This program will run the spindle at increasing speeds for about 3 minutes in order to warm up the spindle bearings.
-