Parts
No parts specified.
-
-
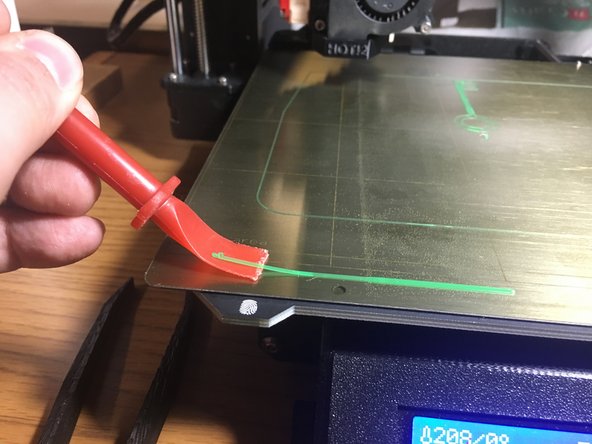
Use the plastic scraper to remove any filament remnants stuck to the bed.
-
Do not use any metal tools or anything else that could damage the build surface. The plastic tool should be all you need!
-
Clean the bed thoroughly with isopropyl alcohol and a paper towel or KimWipe.
-
The most common causes of first-layer adhesion problems are failure to complete clean the print surface.
-
-
-
You should already have your file prepared on an SD card. (Go to [link to slicing guide] if you haven't done that yet.
-
Insert your SD card into the slot in the left side of the LCD.
-
The gold contacts on the SD card should be facing toward the front of the machine (toward you).
-
Once the card has been inserted the display should update to show "Card Inserted"
-
-
-
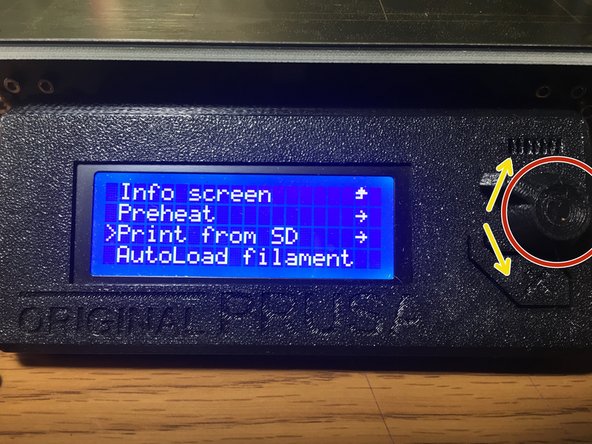
Press the button on the control panel to enter the menu.
-
Rotate the knob to select "Print from SD"
-
Press the button again to select "Print from SD"
-
-
-
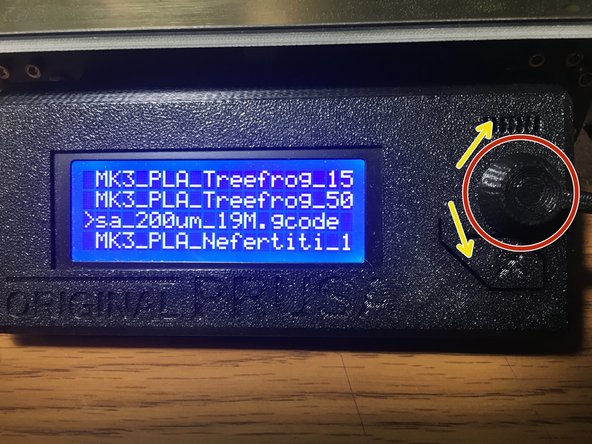
Scroll through the list to locate your file.
-
The list should be sorted by most recently saved, so your file is probably at the top of the list.
-
Press the knob to start your print.
-
-
-
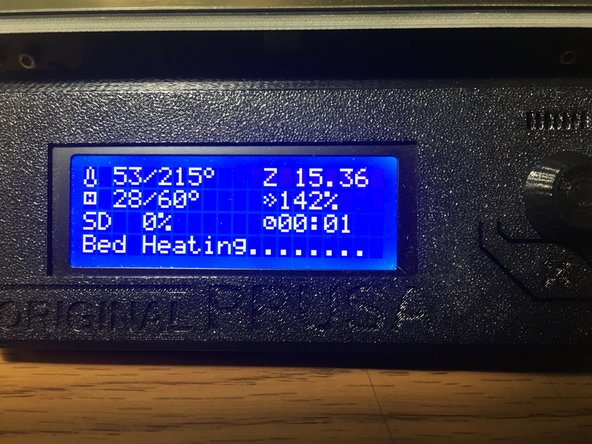
The display will show bed heating until the nozzle and bed are up to temperature.
-
Once the nozzle and bed are heated, the printer will home itself and probe the bed for level.
-
Preheating the machine will avoid having to wait for this to finish (it will already be heated.)
-
-
-
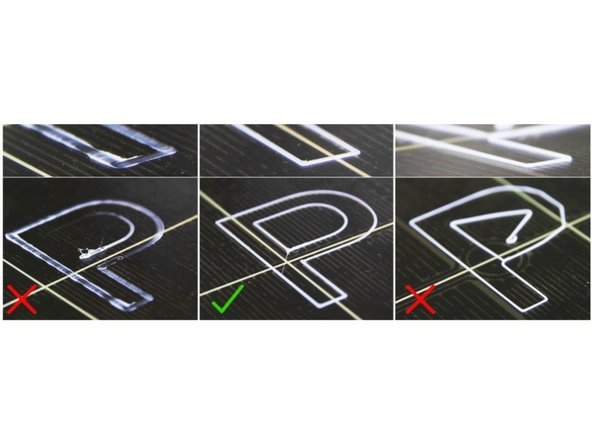
First layer adhesion is the most critical phase of the print.
-
Watch the first layer to be sure that it has a smooth appearance and is sticking to the bed well. The layer should appear slightly smooshed to the bed, but not so much that they have gaps (too low) or appear rounded or don't stick to the bed. (too high)
-
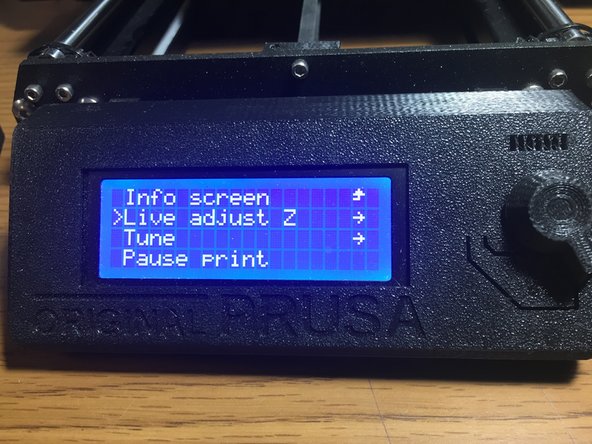
You can tune the Z-height of the first layer to dial things in. Press the knob on the control panel to enter the menu and select "Live adjust Z"
-
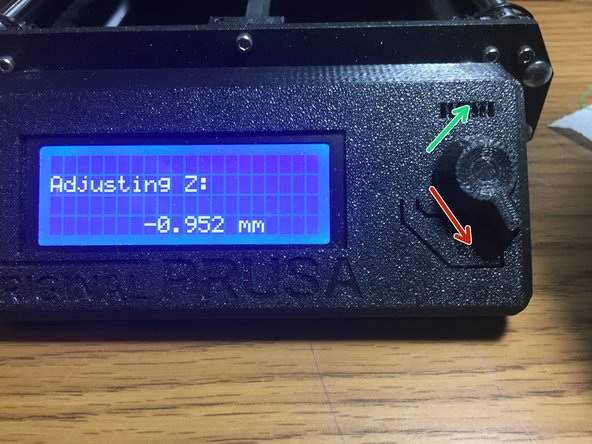
Turn the knob clockwise to raise the head.
-
Turn the knob counter-clockwise to lower the head.
-
When you have finished adjusting the Z-height, press the knob to return to the menu.
-
Small adjustments should be all that's needed to make a great first layer. If you need to adjust the Z-height by more than about 0.05mm, stop the print and post on the talk site. The machine may need recalibration.
-
-
-
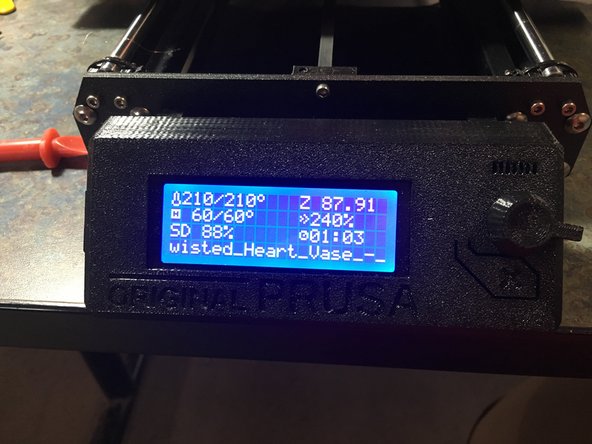
Once the first layer is completed, you should be good to go! Now you just need to wait for it to finish!
-
Check on the printer every now and then to make sure nothing has gone awry.
-
DO NOT leave the space with the printer still running. You needn't watch the entire print run, but someone must remain at the space while the printer is running.
-
In the event of a problem, either select "Stop Print" from the control menu, or simply turn off the printer.
-
-
-
Lift the steel sheet off the printer by lifting it at the corners.
-
Be careful to not lift so high as to scrape the bottom of the hot-end. If needed raise the carriage (press and hold the control button).
-
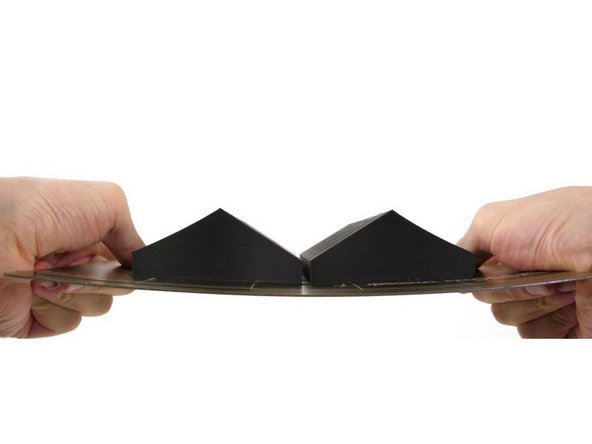
Flex the steel sheet slightly to pop your parts off the platform.
-
It can help to flex the sheet both inwards and outward. Small parts might need some manual removal with the plastic scraper.
-
-
-
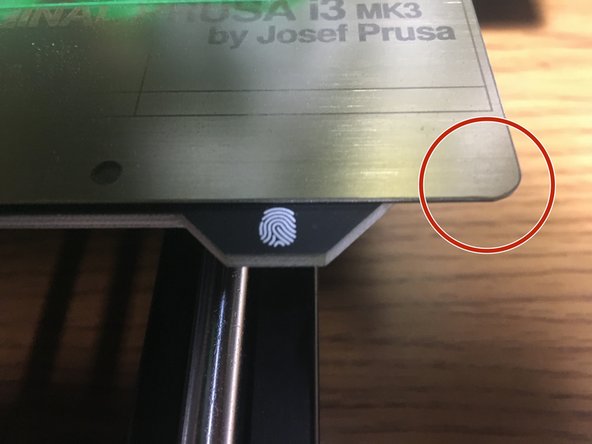
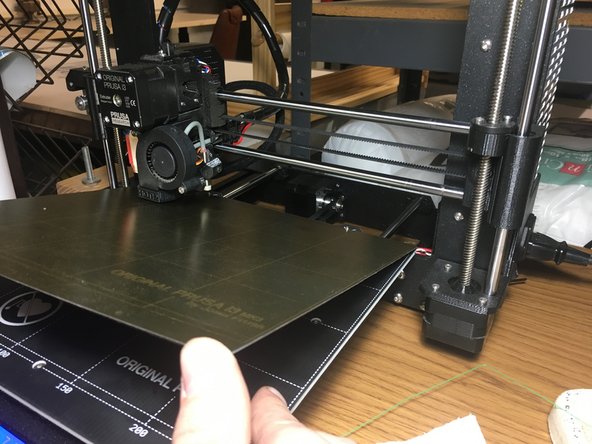
Hold the front edge of the steel sheet up while you slide it toward the back of the machine.
-
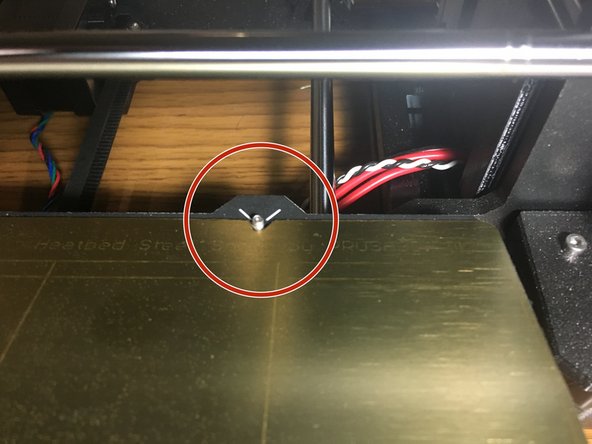
Be sure the two notches in the plate fully seat onto the pins on the back of the bed.
-
Carefully lower the sheet onto the bed.
-
Be careful, the magnets are very strong. Hold the sheet by the front corners to prevent getting pinched.
-
-
-
Use the spatula to remove any remnants of filament on the build platform (don't make the next user clean up after you!)
-

![You should already have your file prepared on an SD card. (Go to [link to slicing guide] if you haven't done that yet.](https://d3t0tbmlie281e.cloudfront.net/igi/makers/MeQIePhJawYWBoYg.medium)